Creating Curtain Panel Types
Files you'll need to complete this Lesson
In this lesson we will learn how to create a curtain panel type and lout for the house used in the previous exercises.
Getting Started
Make sure you have the source files downloaded for this exercise. You can get them with the links above.
Assign Curtain Panels with Substitution in Place
- Open Revit file:
Lab03_E3_Creating curtain panel types.rvt. - Open the
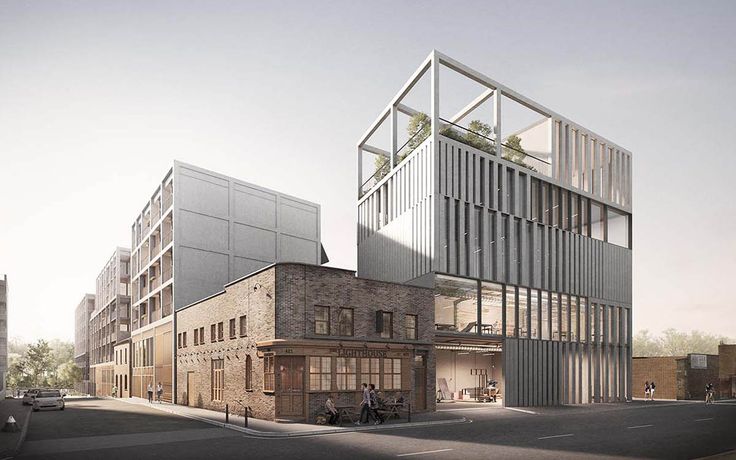
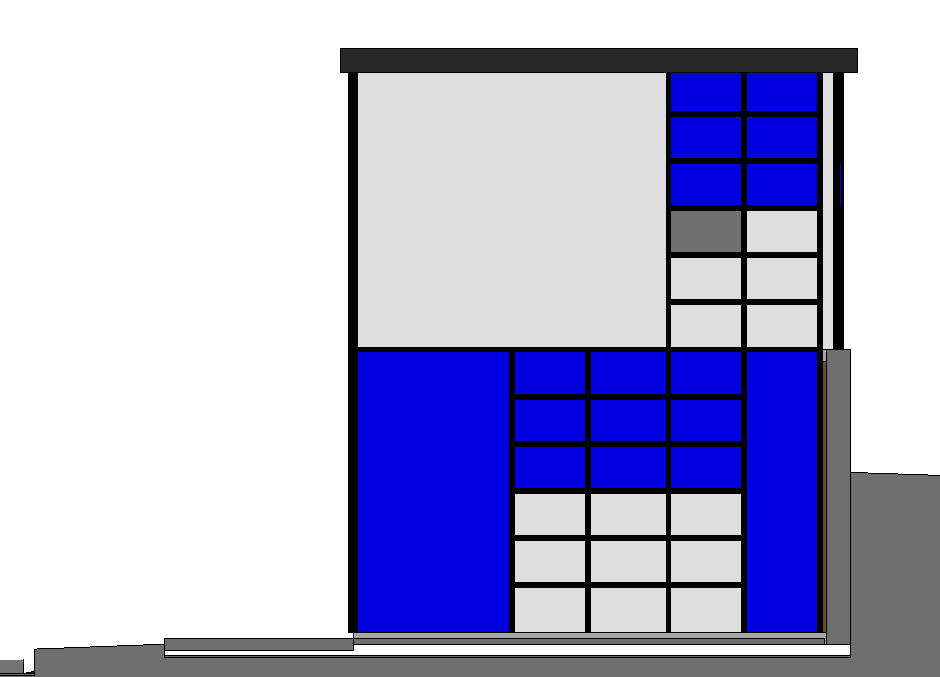
North-Residenceelevation view. - Select the Panels that are highlighted in the below screenshot by hovering over the curtain wall edge and hitting the
tabkey until the panel you want is highlighted.Left Clickto select.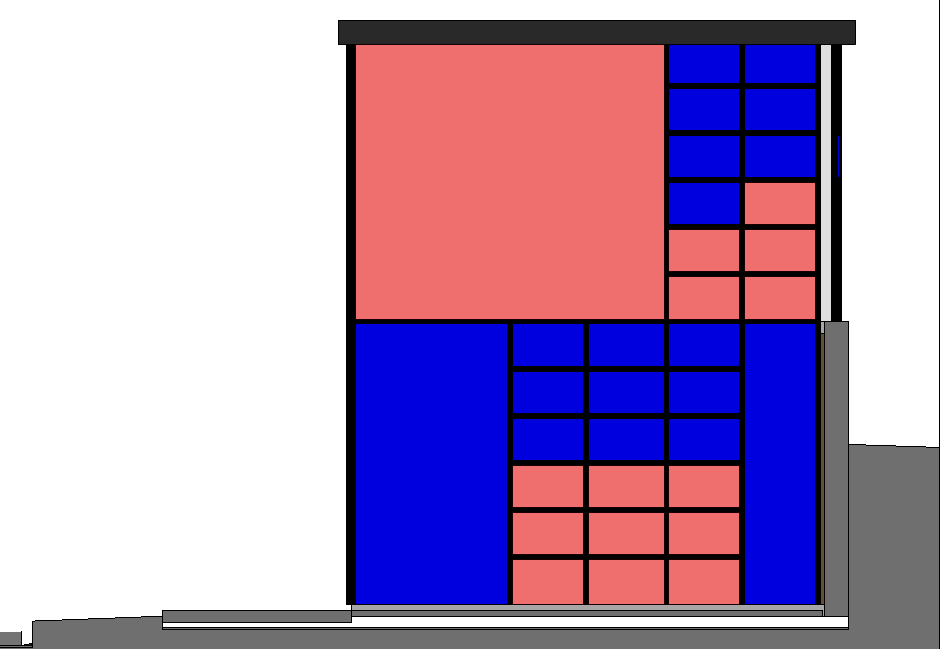
- In the properties pallette select the
Solid - Whitecurtain panel type. - Once all are converted your curtain wall should look like this:
Create New Curtain Panel Type
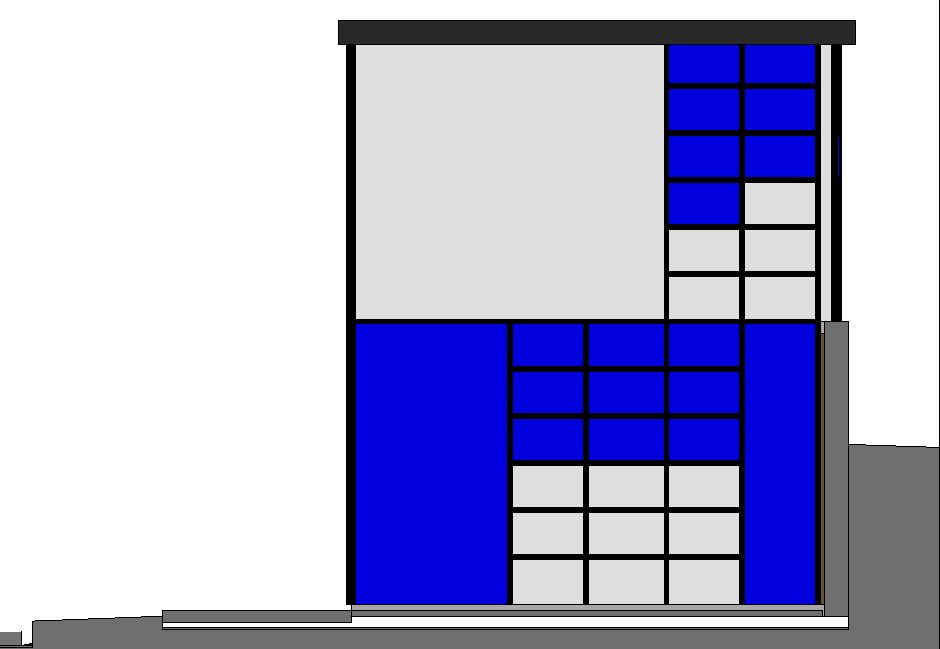
- Select highlighted panel as below:
- In Properties Palette, click the
Edit Typebutton. - In the Type Properties dialog box click
Duplicate. - Set name to
Solid - Grayand click OK.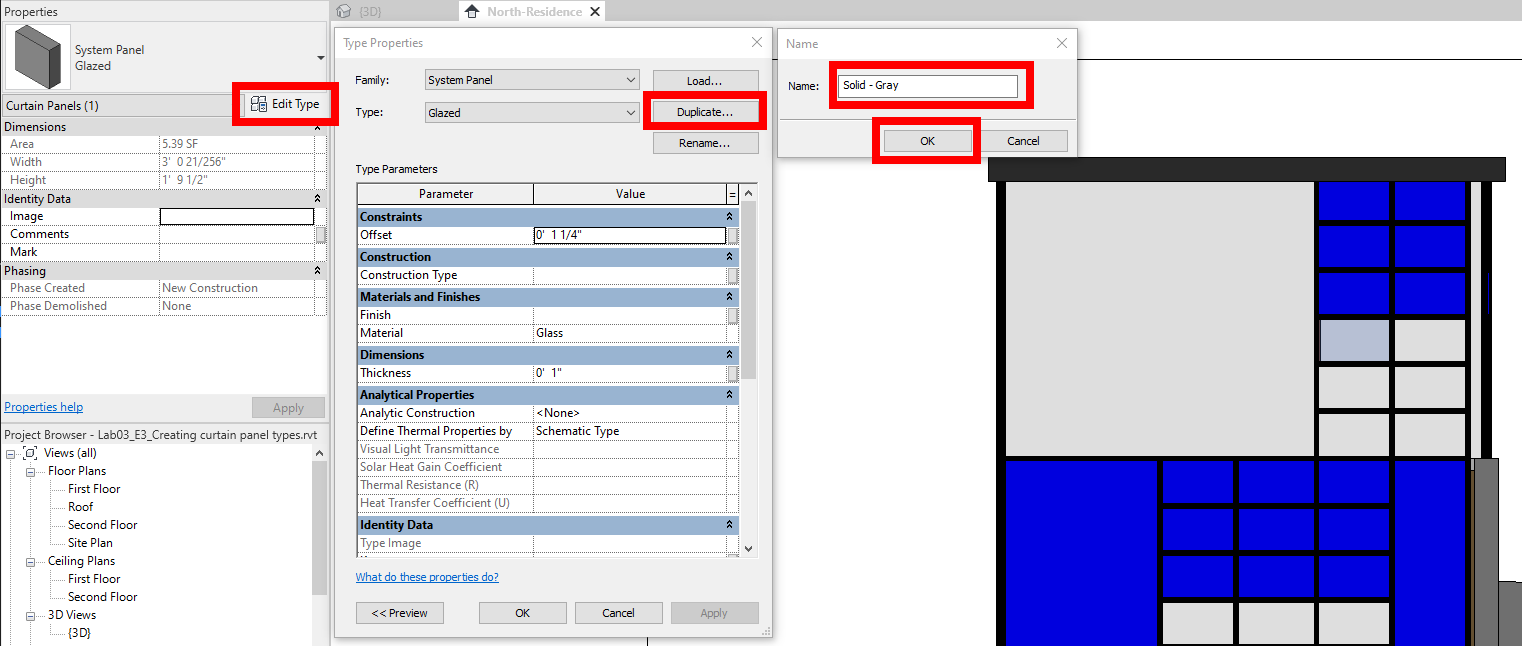
- In the Type Properties dialog click on the Material
Glassthen click on the browse button that appears (labeled...). - Type "gray" in the search window and select the
Gray Panelmaterial. - Click
OKin both menus to continue. - Progress shown below:
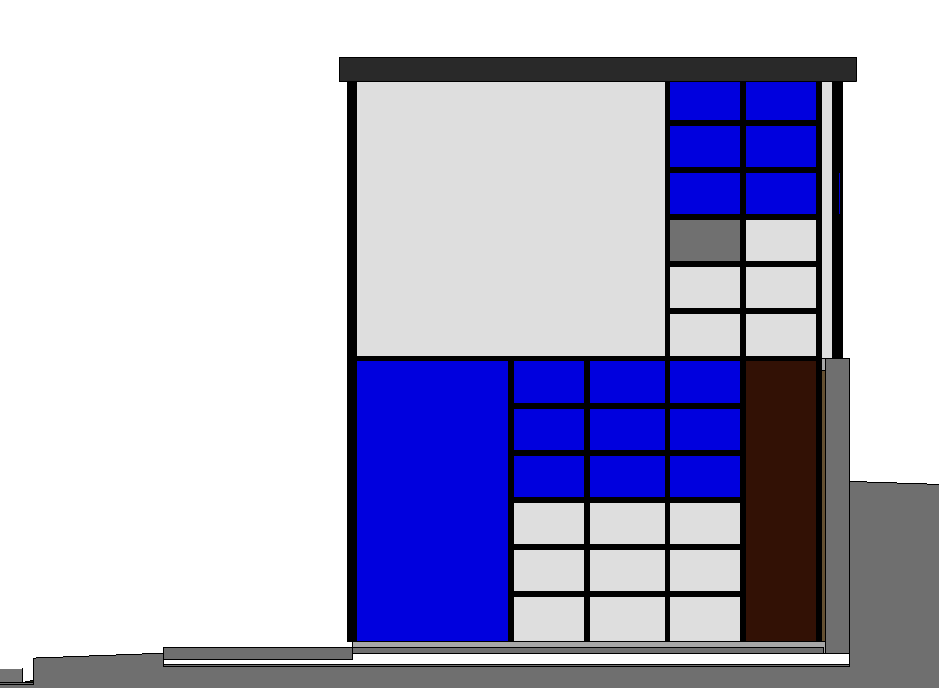
- Repeat the above steps to create a new panel type
Wood Panel - Darkwith a material ofWood Panel - Dark - Apply this panel to the below panel location.
Save your file
Save your file as Spring2024_3262_firstinitial_lastname_LAB03_EX03.rvt