
Doors in Curtain Walls
Files you'll need to complete this Lesson
Adjust a curtain segment to create a panel with the dimensions desired to house a door within a curtain wall from the model of previous exercises.
Getting Started
Make sure you have the source files downloaded for this exercise. You can get them with the links above.
Substitute a Curtain Panel with a Door
- Open Revit file:
Lab03_E4_Placing door in curtain walls.rvt - Open the
South-Studioelevation view. - Modify the curtain grid lines as shown in previous lessons to match the layout below:
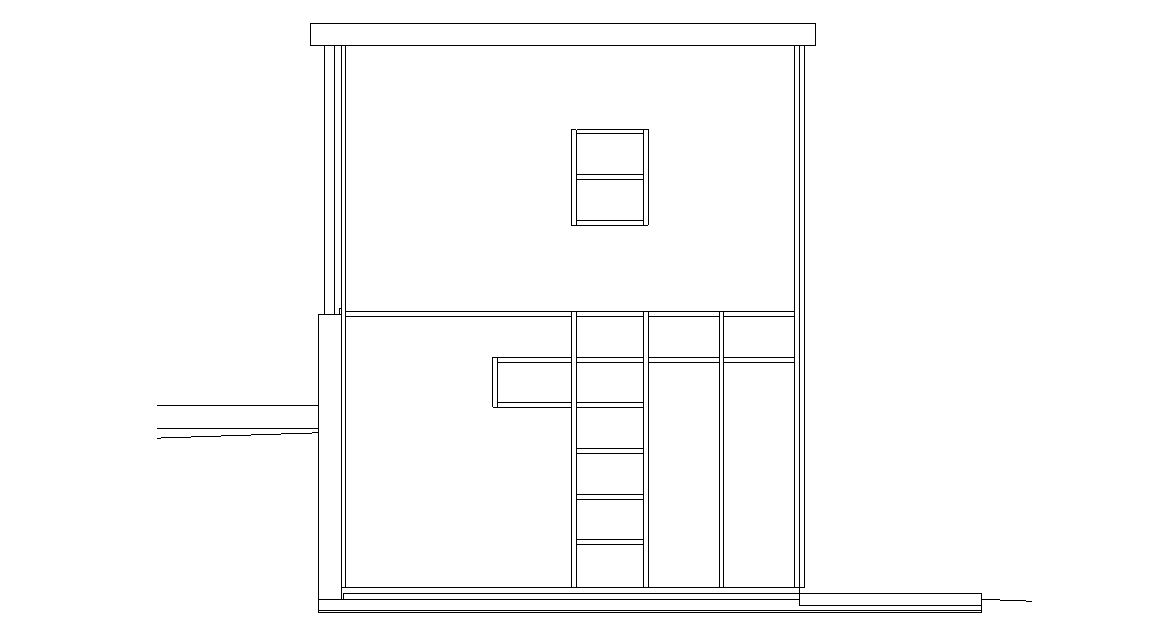
- select the vertical curtain grid line shown below and change the left dimension to
4'-0":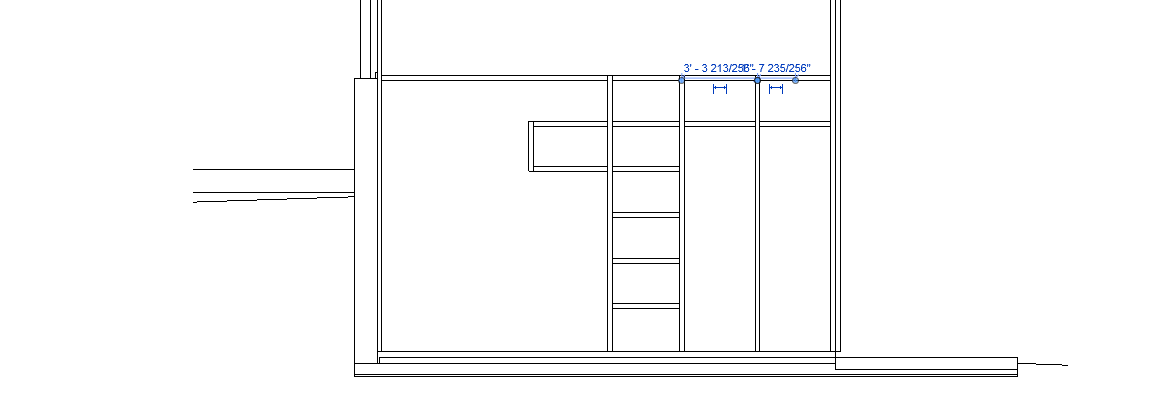
- Results shown below:
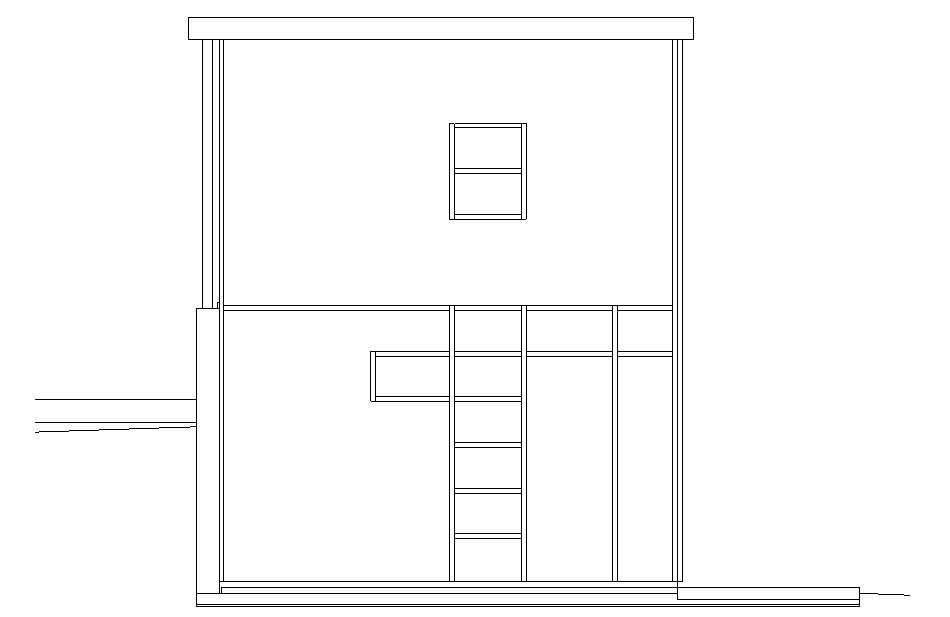
- Change your view mode from
Hidden LinetoShaded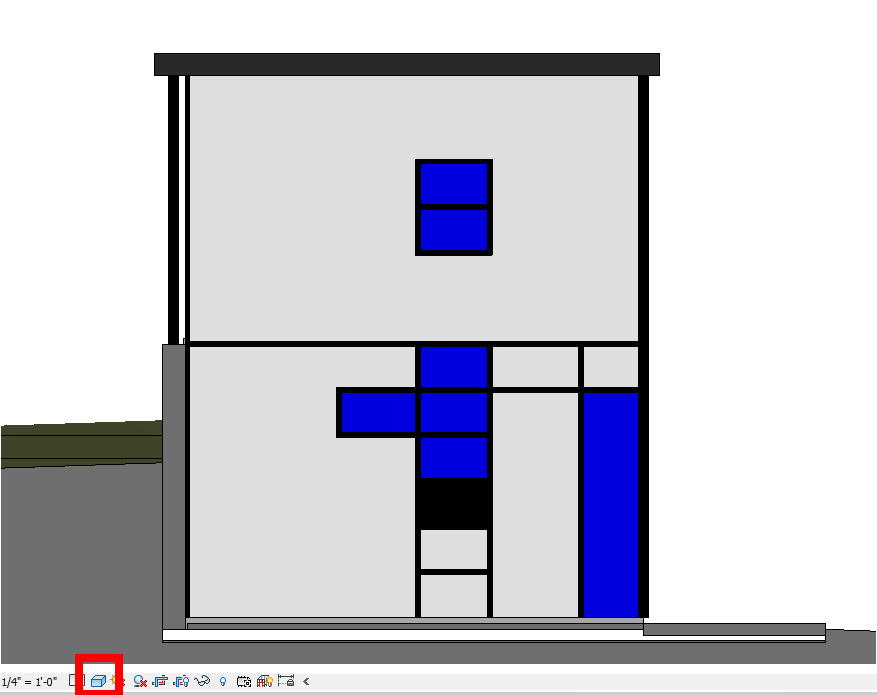
- Assign
Wood - Darkpanel type to panels shown below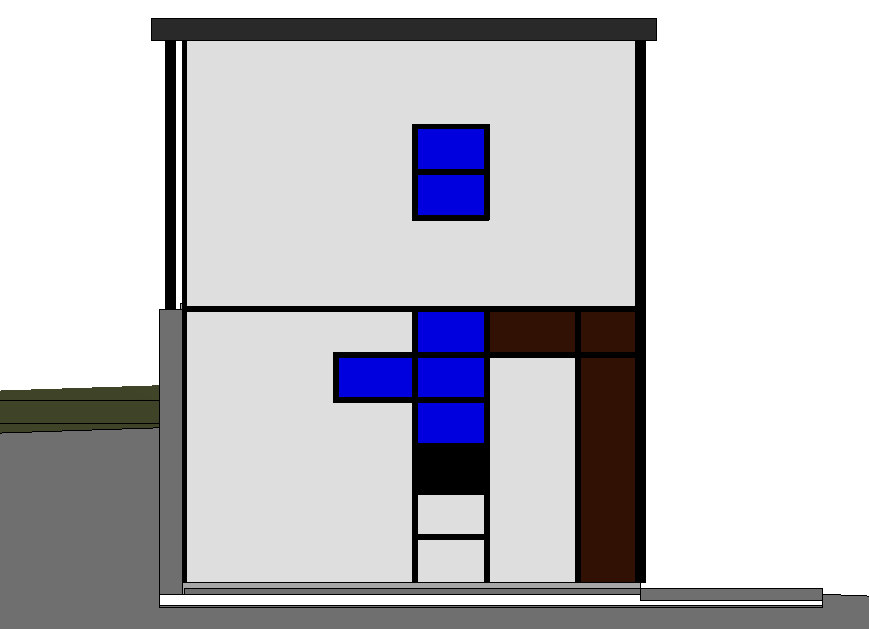
- As shown below set the highlighted panel to the
Curtain Wall Single Door - Woodtype.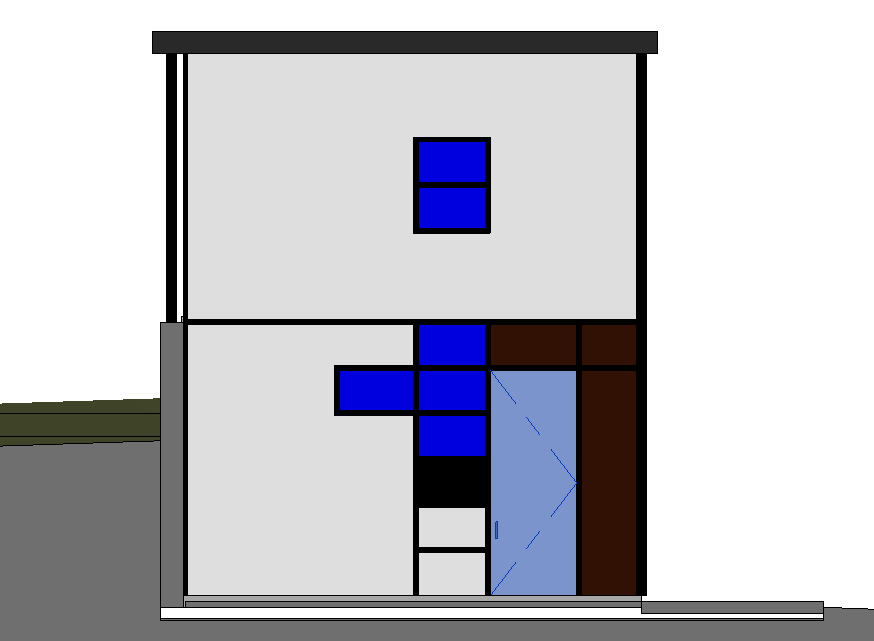
Save your file
Save your file as Spring2024_3262_firstinitial_lastname_LAB03_EX04.rvt