Creating Stairs & Ramps
Files you'll need to complete this Lesson
In this lesson we will go over the basics of creating a stair by sketching run lines. We will lean to Flip a stair direction into place, Create stairs with multiple runs and complex layouts like L-shaped, U-shaped, and curved stairs. You will also learn how to create and modify ramps.
Getting Started
Make sure you have the source files downloaded for this exercise. You can get them with the links above.
Create a Straight Run Stair
- Open Revit file:
Lab04_E1_Creating Stair and Ramp.rvt - Open the
First Floorfloor plan view. The Dashed red boundary inside the studio room is where the stair will be placed. - On the architecture tab click on the
Stairbutton.
- Set the
Base Levelto theFirst Floorand theTop LeveltoSecond Floorin the properties palette. - Make sure the
Actual Run Widthis set to3' 0"and that you have theStraightdraw mode chosen.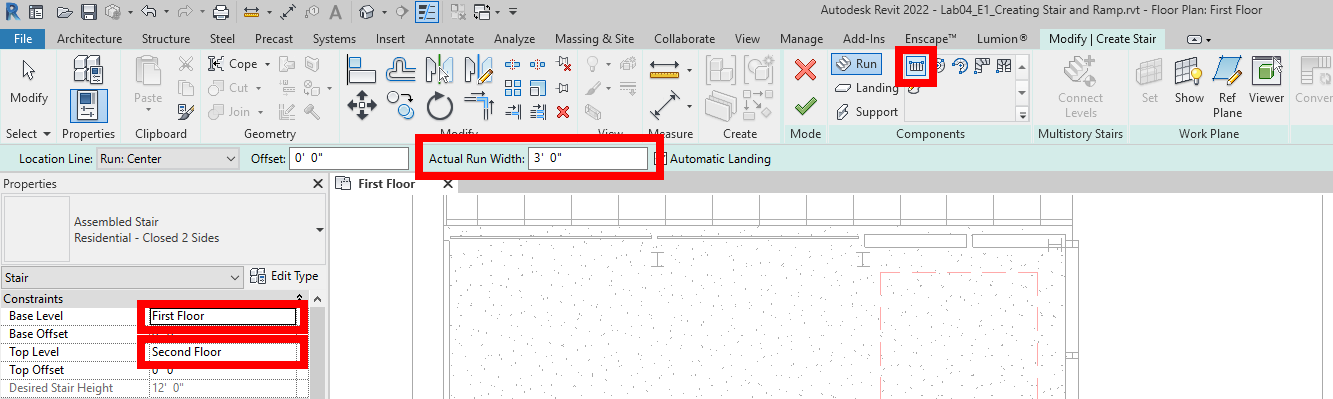
- Draw the stair as shown below starting from the top of your screen to the bottom.
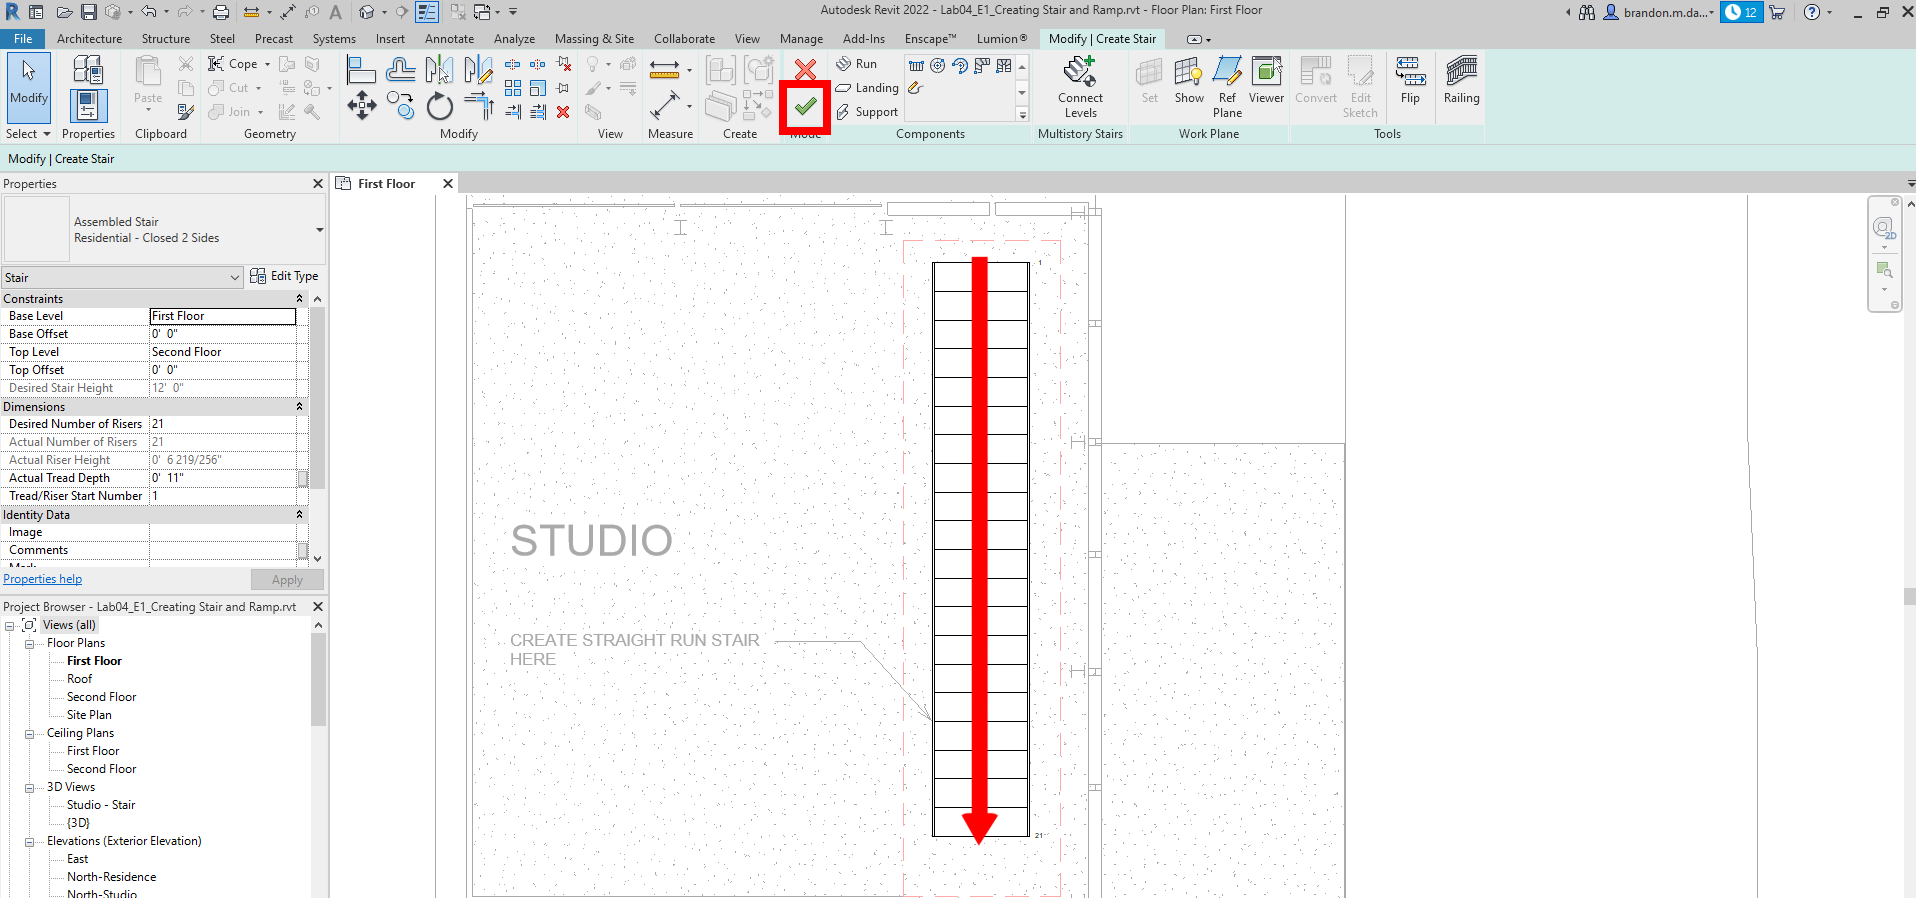
- Press the green checkmark to confirm (as highlighted above)
- Click on the stair and then use the arrow keys to nudge it into place as shown below.
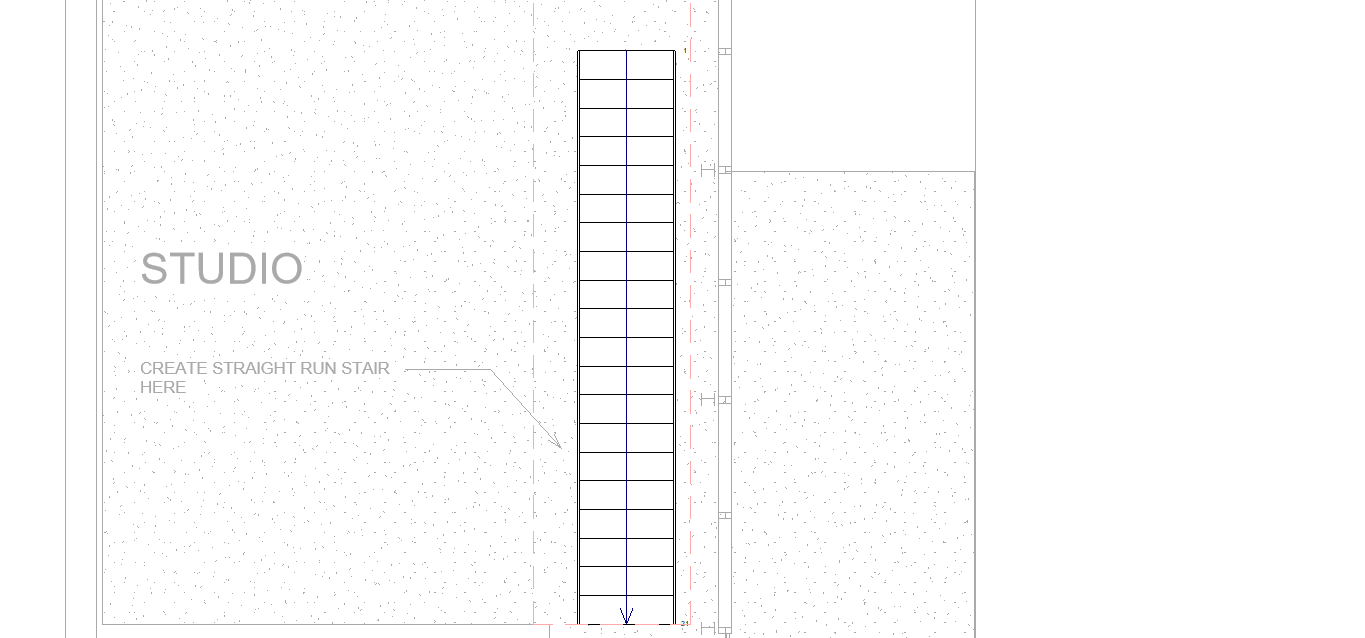
- Hit
esctwice to exit the stair command
Create an L-Shaped Ramp
- In the same
First Floorplan view we will be drawing a L-Shaped ramp in the other red dashed box. - On the architecture tab click on the
Ramptool.
- Set the
Base LeveltoFirst Floorand set theBase Offsetto-1' 9". - Set the
Top LeveltoFirst Floor. - Confirm that the ramp
Widthis set to3' 0"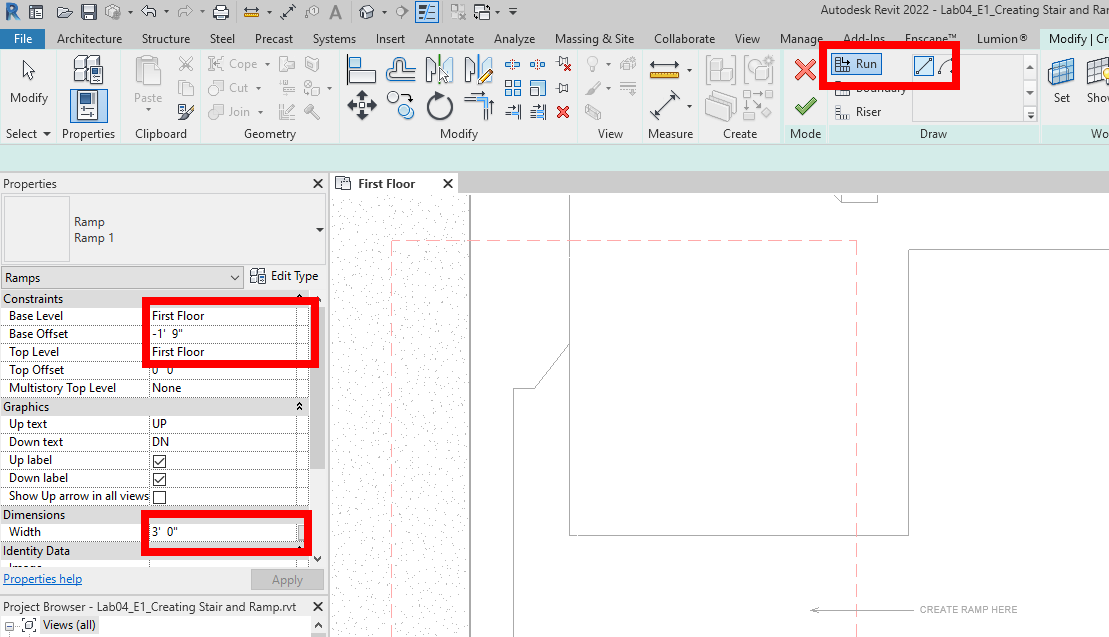
- Sketch the ramp by clicking on point 1, then move the mouse down
15' 0"to mark 2. Then move the mouse cursor to approximately mark 3 and left-click then move the mouse until you have used up the whole length of the ramp. It should be around6' 0".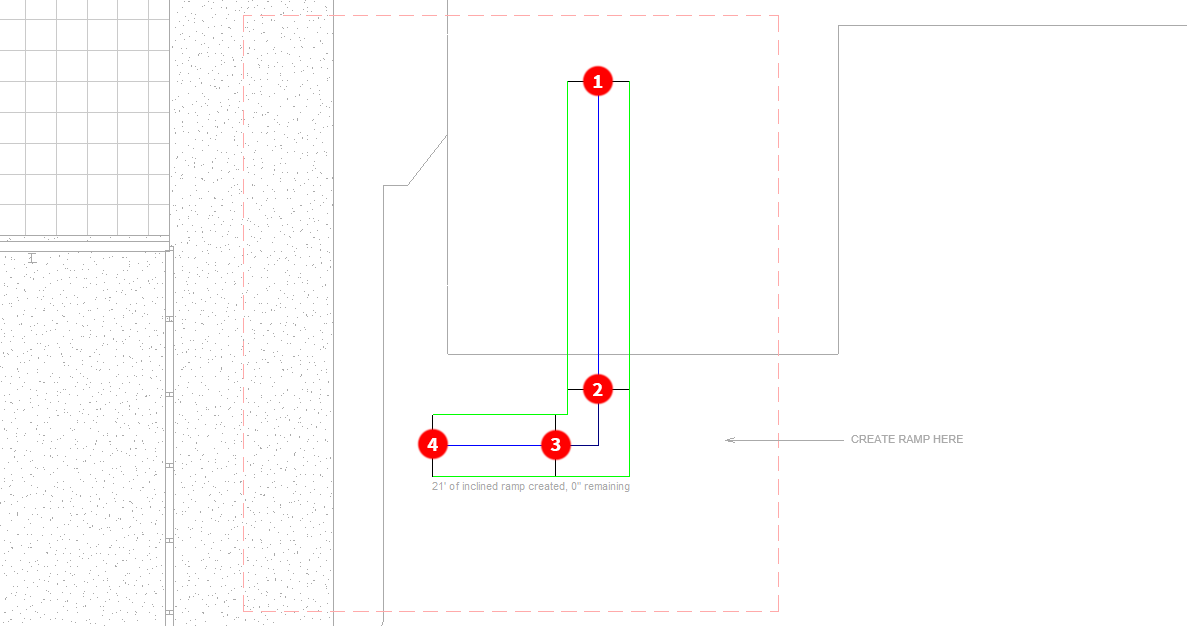
- Click on the green checkmark to finish drawing the ramp. Don't worry about the ramp not being in the right place yet.
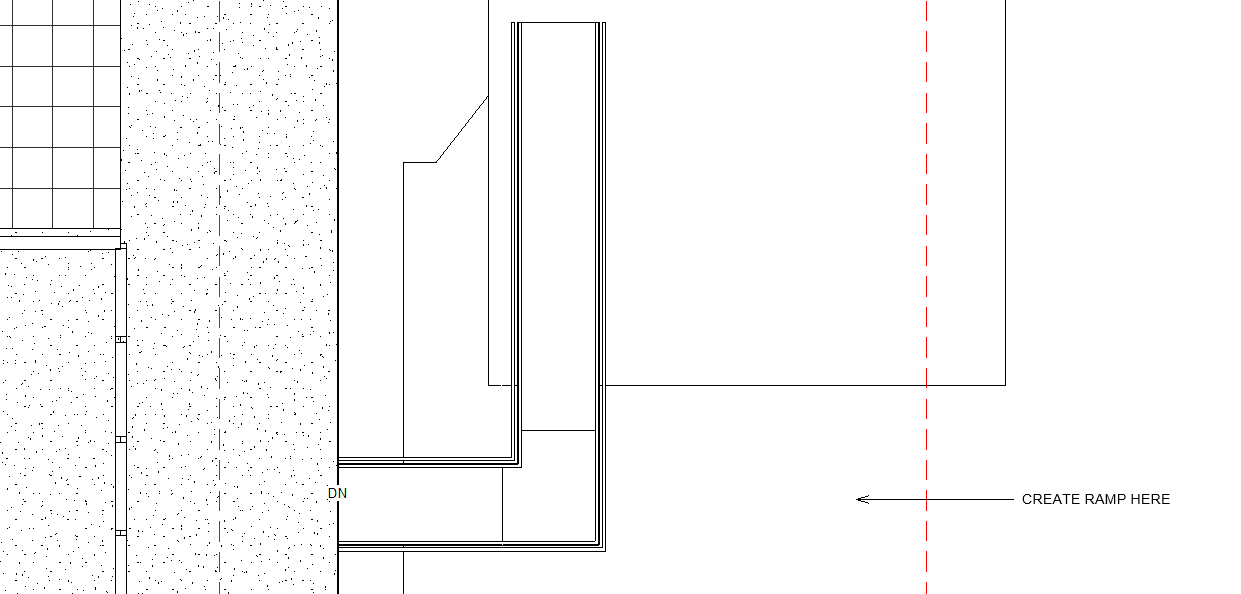
- Move the ramp to it's final position against the concrete slab as shown.
- Open the
{3D}3D view and see the ramp as shown.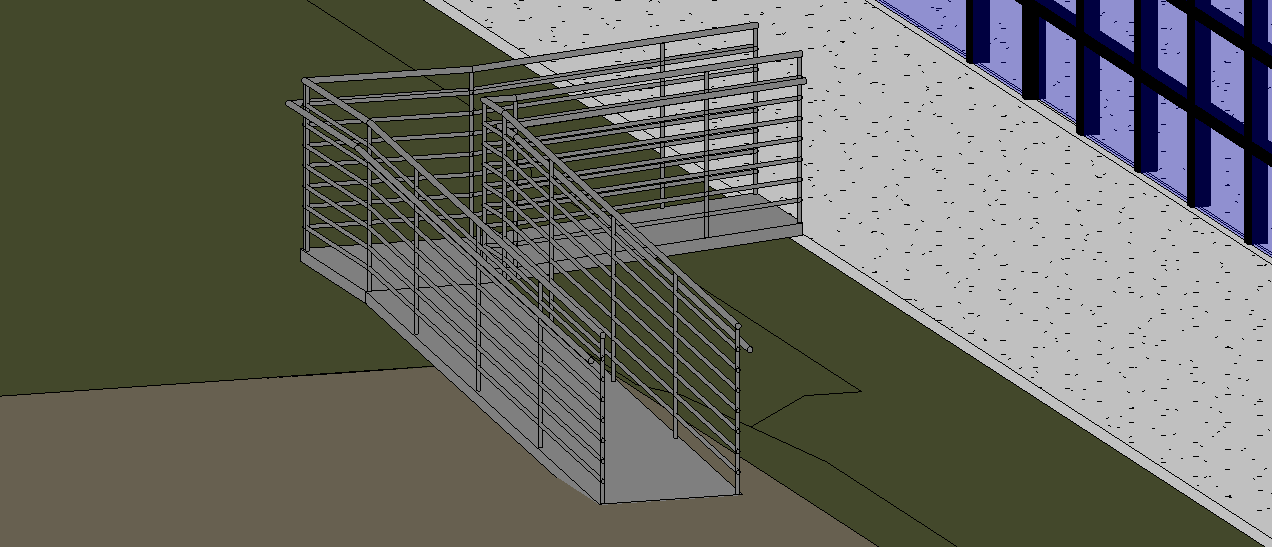
- Delete the railings.
- Select the ramp and set the
Top Offsetto0' -3"to align it with the sidewalk better.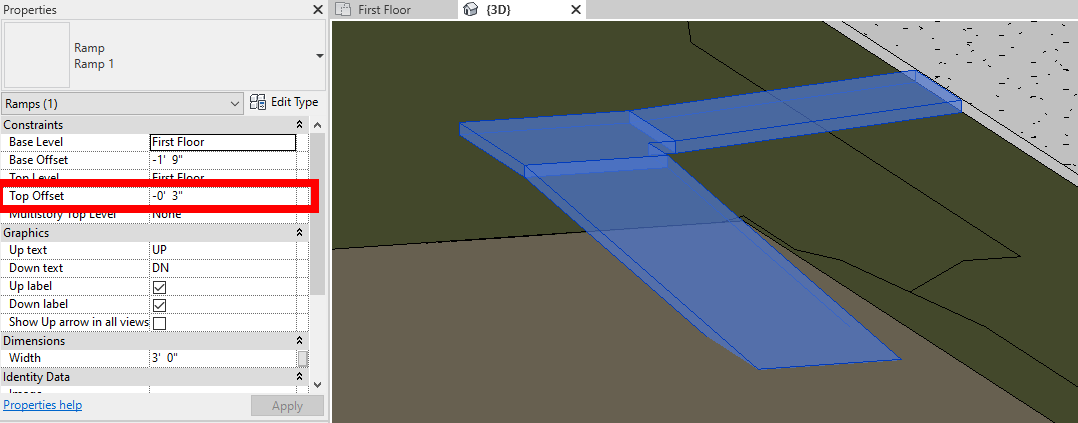
- Make the ramp solid by clicking on the ramp and in the properties palette click
Edit Type. SetShapetoSolidand click OK.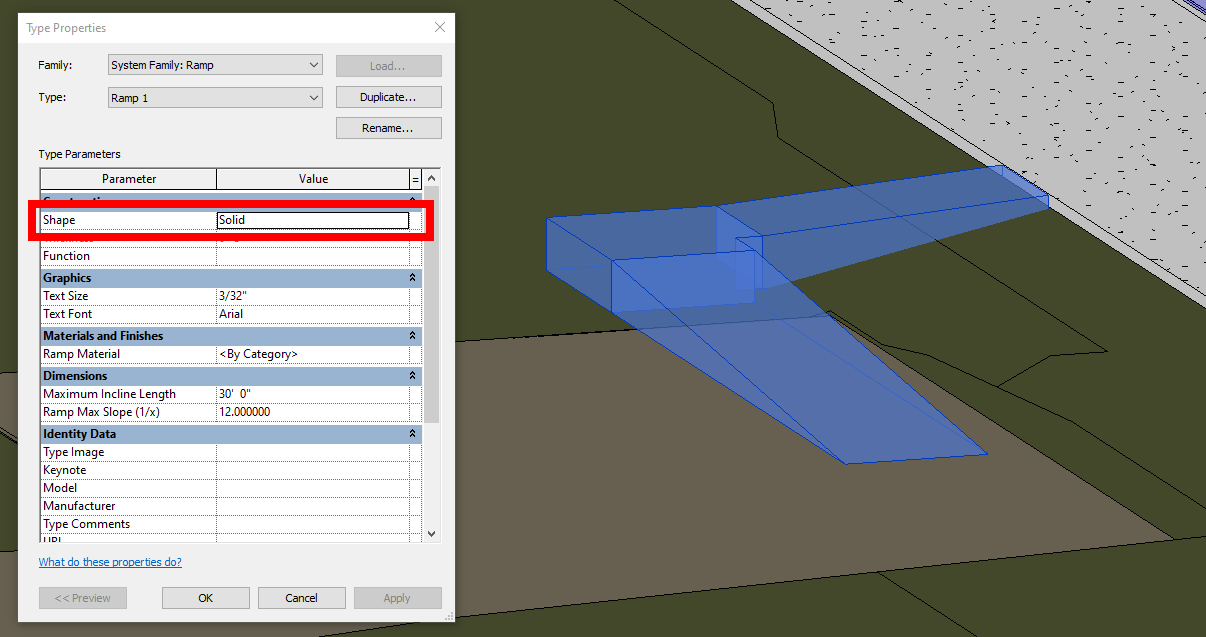
Save your file
Save your file as Spring2024_3262_firstinitial_lastname_LAB04_EX01.rvt