
Creating Custom Stairs
Files you'll need to complete this Lesson
In this lesson you will learn how to edit the sketch to change the stair boundary and shape of risers. You will learn how to change stair and rail types, and modify the steepness of a stair by adjusting it's properties. Finally you will learn how to create a spiral stair.
Getting Started
Make sure you have the source files downloaded for this exercise. You can get them with the links above.
Create a Stepper Studio Stair
- Open Revit file:
Lab04_E2_Modeling Custom Stairs.rvt - Open
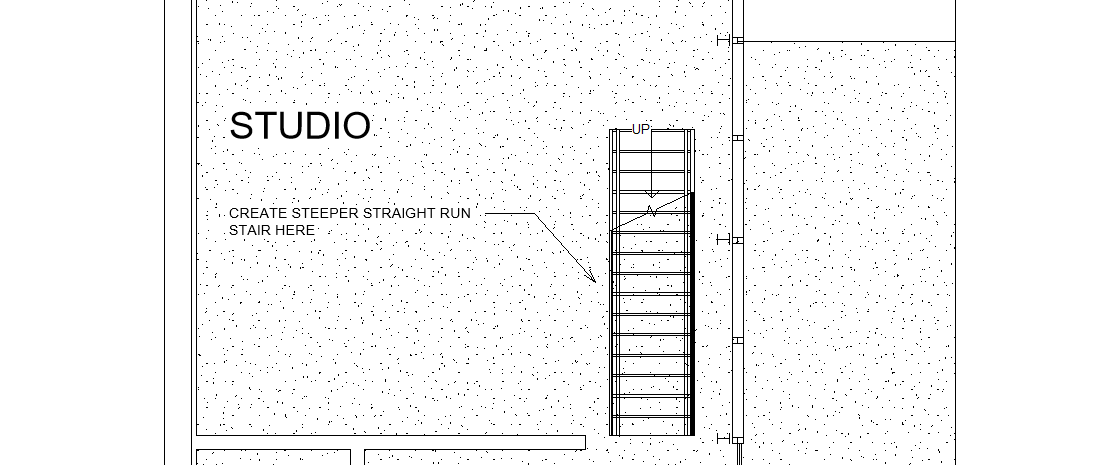
First Floorplan view. - Delete the stair in the studio so we can make a new steeper one.
- On the architecture tab click on the
StairButton. - In the properties palette select the
Residential - Open Riserstair type. - Click
Edit TypethenDuplicate. - Name the new star
Residential - Open Riser - Steep.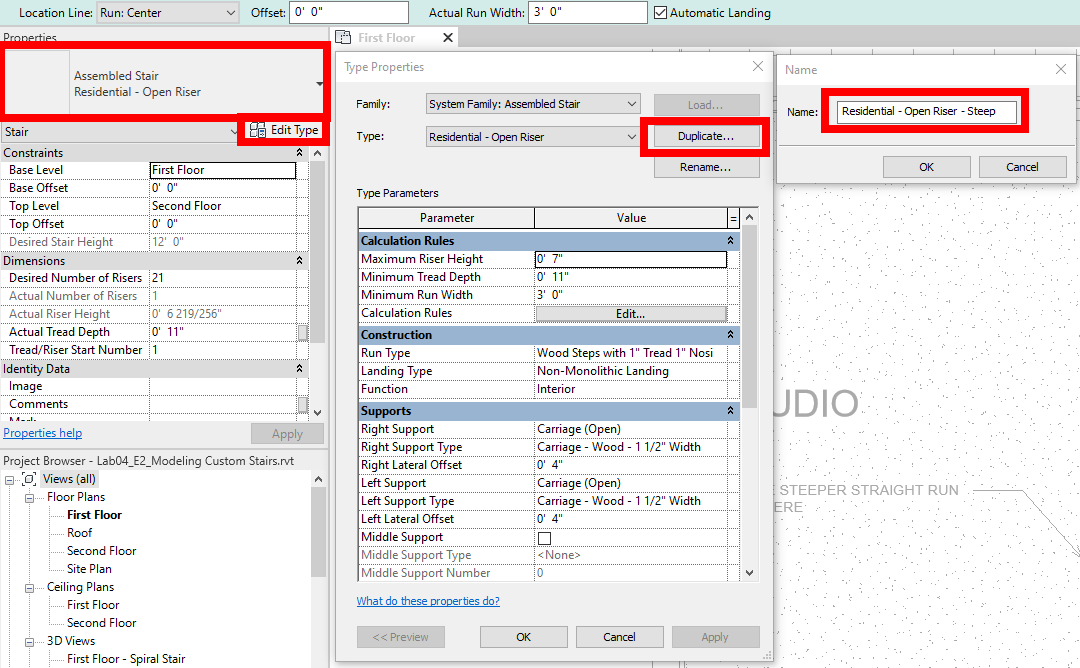
- Set the
Maximum Tread Depthto0' 9"and set theMaximum Riser Heightto0' 9"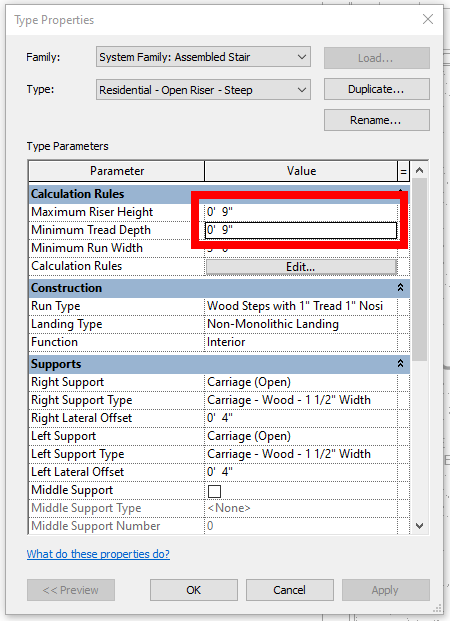
- Click
OKto accept the changes. - Draw the new stair and see how it takes up less room.
- Move the stair to it's final position as shown.
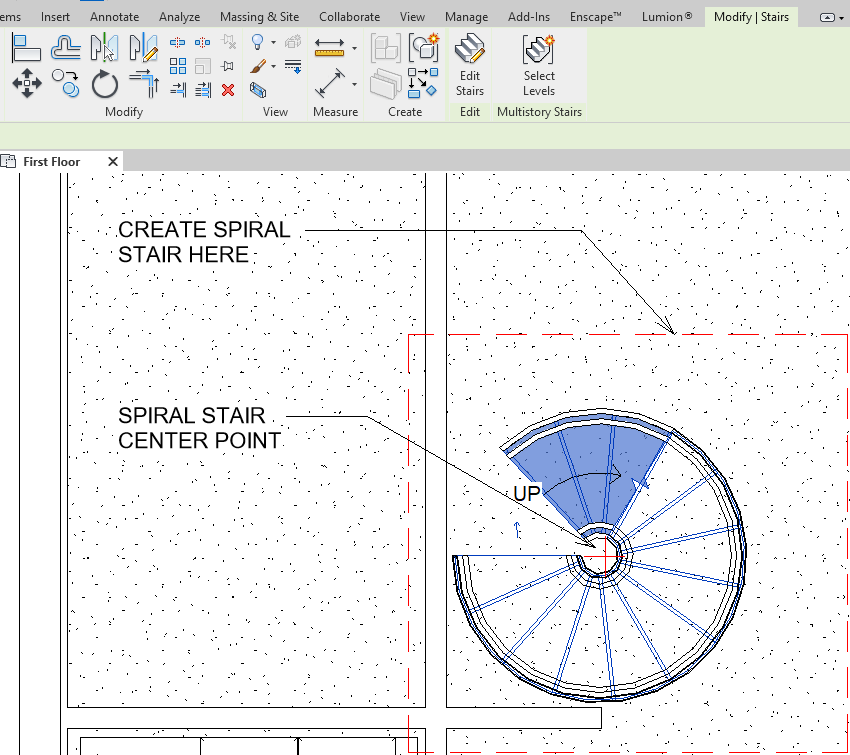
Create a Spiral Stair
- In the
First Floorplan view pan down to the red dashed in area where the spiral stair will be placed. - On the Architecture tab click on the
Stairbutton. - In the properties palette select the stair type
Residential - Open Riser - Click
Edit TypethenDuplicateand set the new stair types name asResidential - Open Riser - Spiral.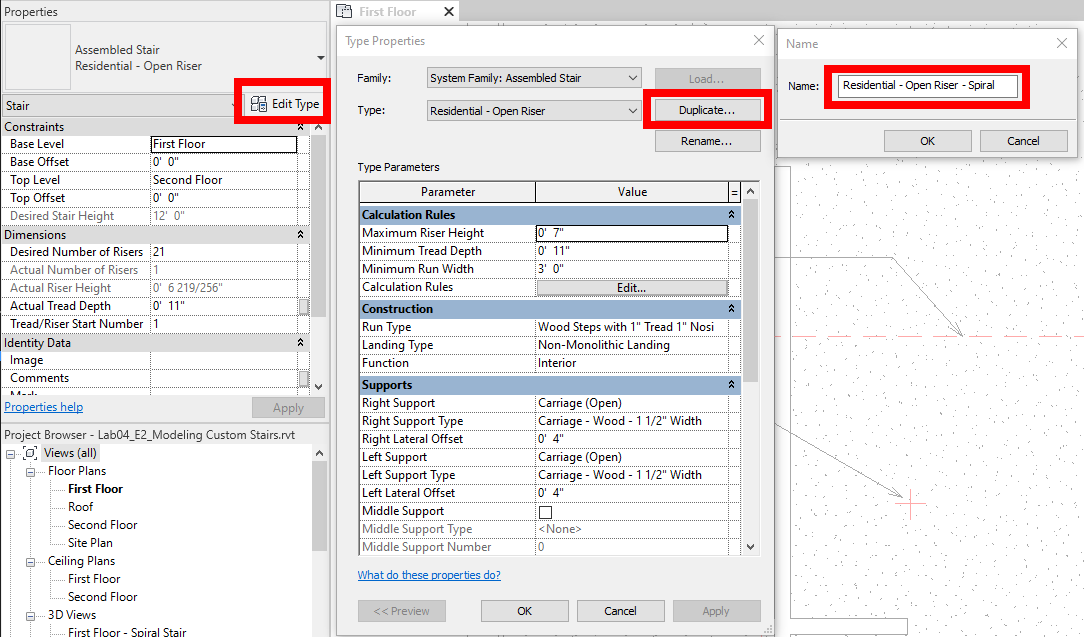
- Set the
Maximum Tread Depthto0' 11"and theMaximum Riser Heightto0' 10"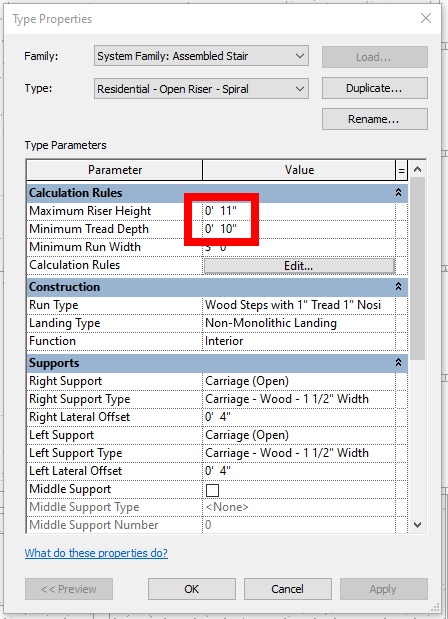
- Click
OKto accept the new type. - On the ribbon choose the
Full-Step Spiralstair draw mode.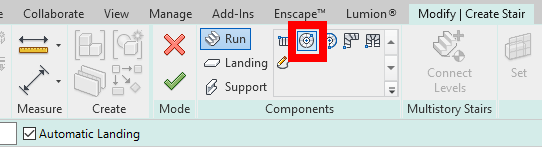
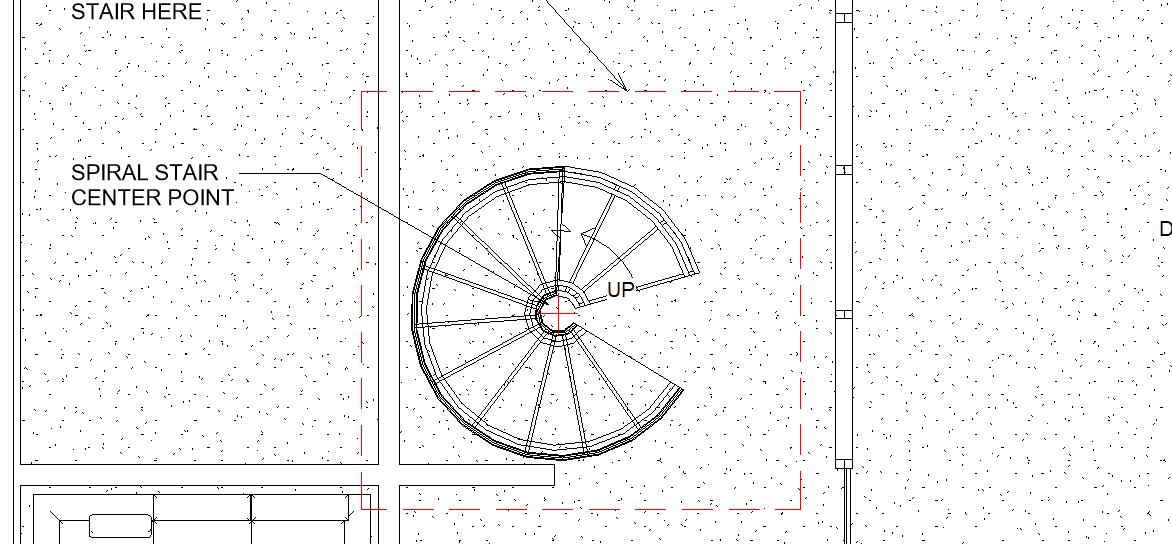
- Click on the marked spiral stair center point.
- Type
2while drawing to set the center radius to2' 0". Don't worry about orientation yet. - Click on the green check mark to finish drawing stair. See Progress below:
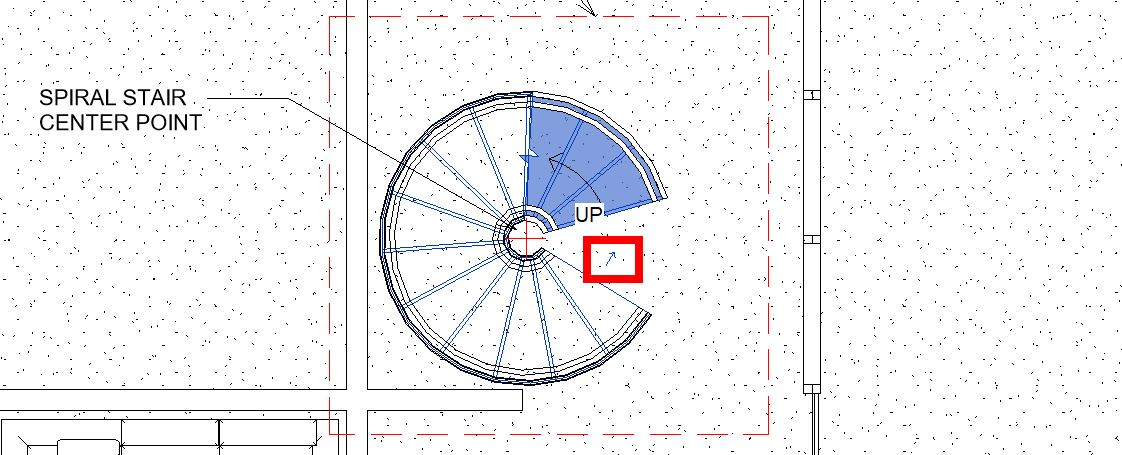
- Flip the stair by clicking on it, then notice the little blue arrow that pops up. Click that.
- Use the rotate tool on the ribbon to rotate the stair into this orientation:
- Click on the railing and change it's type to
Handrail - Pipe - Add a center pole for the spiral stair by clicking on the little arrow below
Columnto selectColumn: Architectural - Select the
Round Column 8"type in the properties palette and set it's constraints toRoof.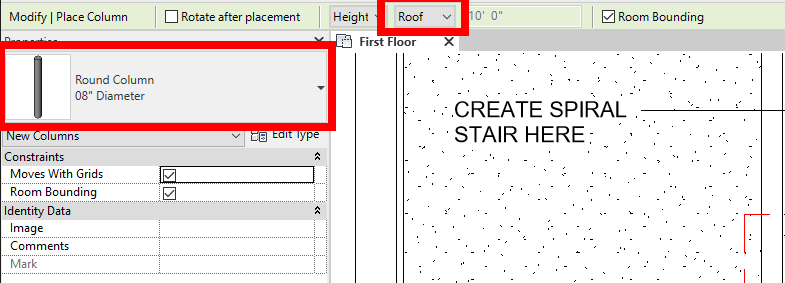
- Place this column in the center of the stair.
- Open the
First Floor - Spiral Stair3D View to see the stair: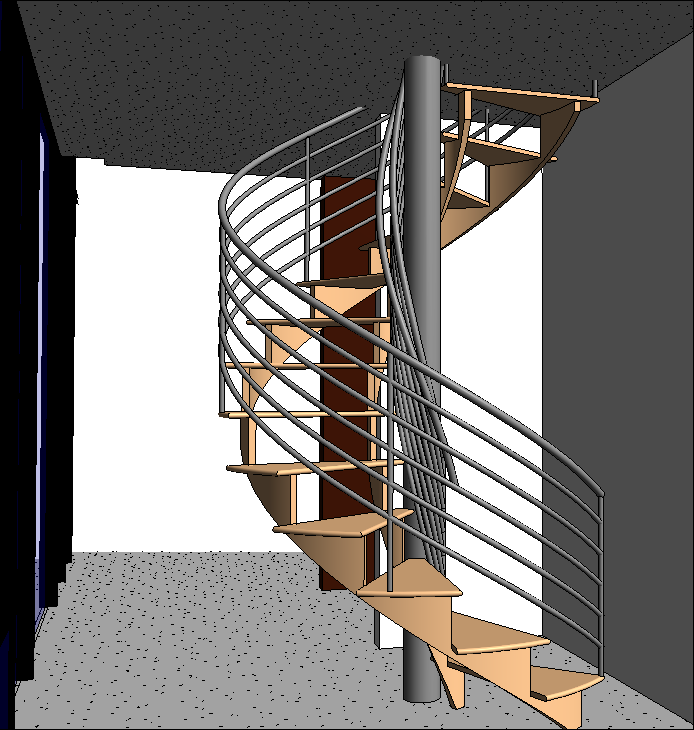
Save your file
Save your file as Spring2024_3262_firstinitial_lastname_LAB04_EX02.rvt