
Creating Elevators
Files you'll need to complete this Lesson
In this lesson you will learn how to place an elevator component, add walls to enclose the elevator, cut an elevator shaft between all levels, and provide openings in the shaft walls to access the elevator at each floor.
Getting Started
Make sure you have the source files downloaded for this exercise. You can get them with the links above.
Place the Elevator Components
- Open Revit file:
Lab04_E4_Creating an Elevator.rvt. - Open the
First Floorplan view. - On the architecture tab click on the
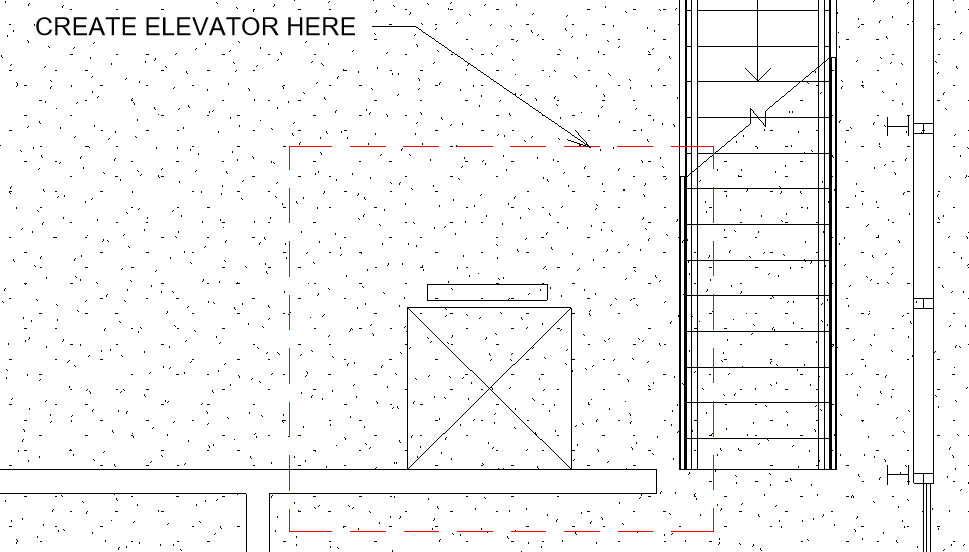
Componenttool and select theElectric_Lift 1000 x 880mm - Place the elevator component at the location shown with the edge aligned with the fall face.
- Select the just placed elevator and use the
Copy to Clipboardcommand on the ribbon.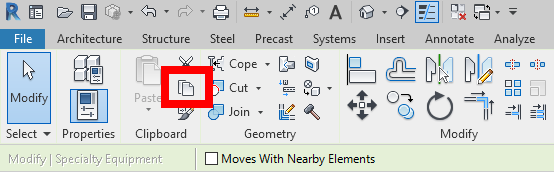
- Open the
Second Floorplan view. - On the
Modifytab click on the little arrow below thePastebutton to select theAligned to Current Viewbutton. This pastes the elevator just above the previous elevator.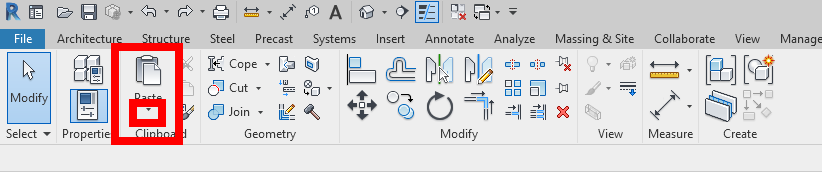
Add Elevator Enclosure Walls
- Open the
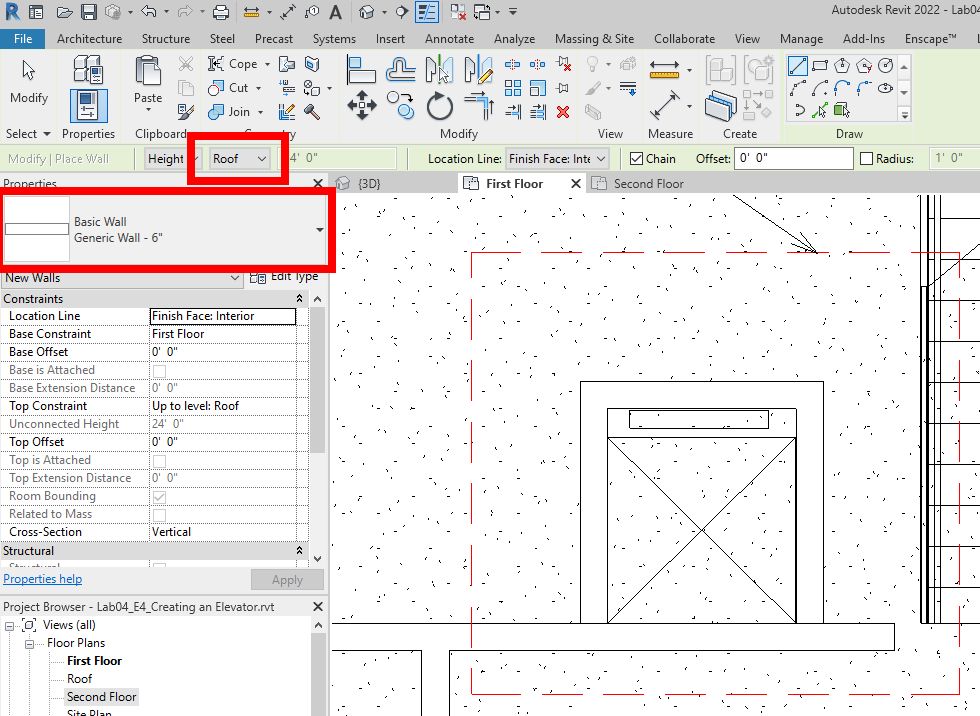
First Floorplan view. - On the architecture tab click on the
Walltool. Choose theGeneric Wall - 6"type. - Set the height constraint to
Roof - Place walls around the elevator as shown:
- Open the
Second Floorplan view. - Place a wall on the front face like before as shown:
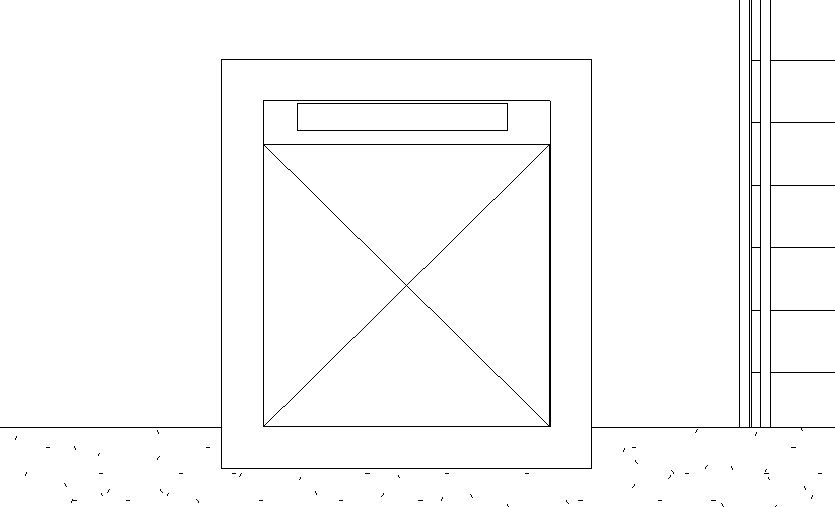
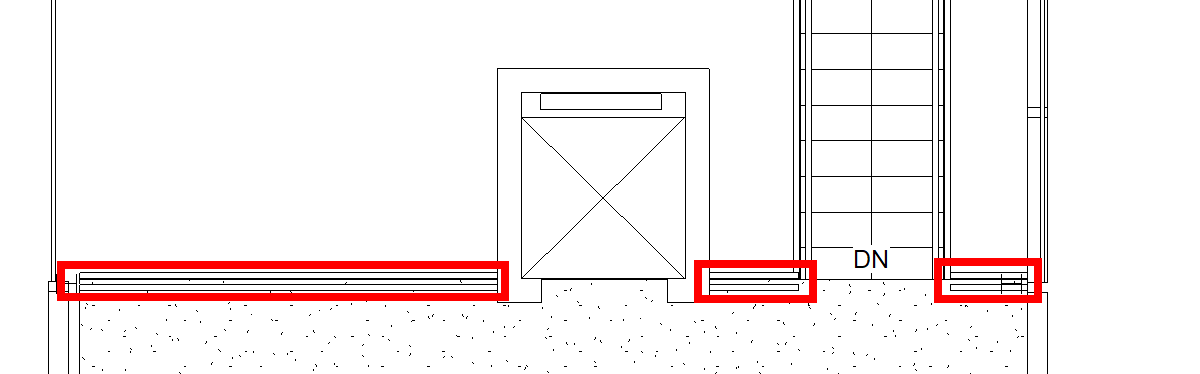
Create Openings for Elevators
- Open the
Second Floorplan view. - On the architecture tab click on the
Wall Openingtool.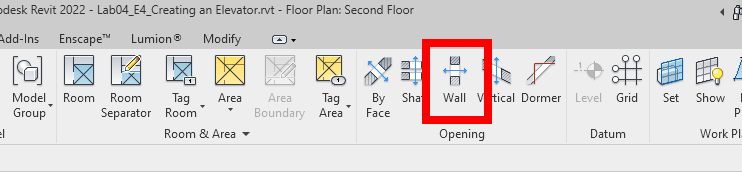
- Place the opening as shown below:
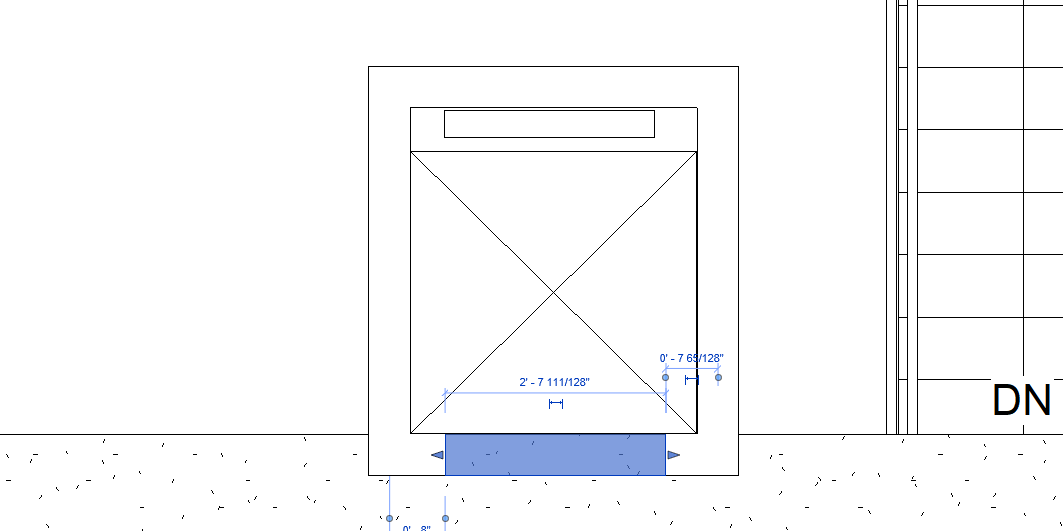
- Select the wall opening element and change the
Top Constraintto beUnconstrainedin the properties palette. - Set the
Unconnected Heightto7' 0 "
- Open the
First Floorplan view and repeat the steps to create an opening on this floor too. - Open the
Second Floor - Elevator3D view to check progress.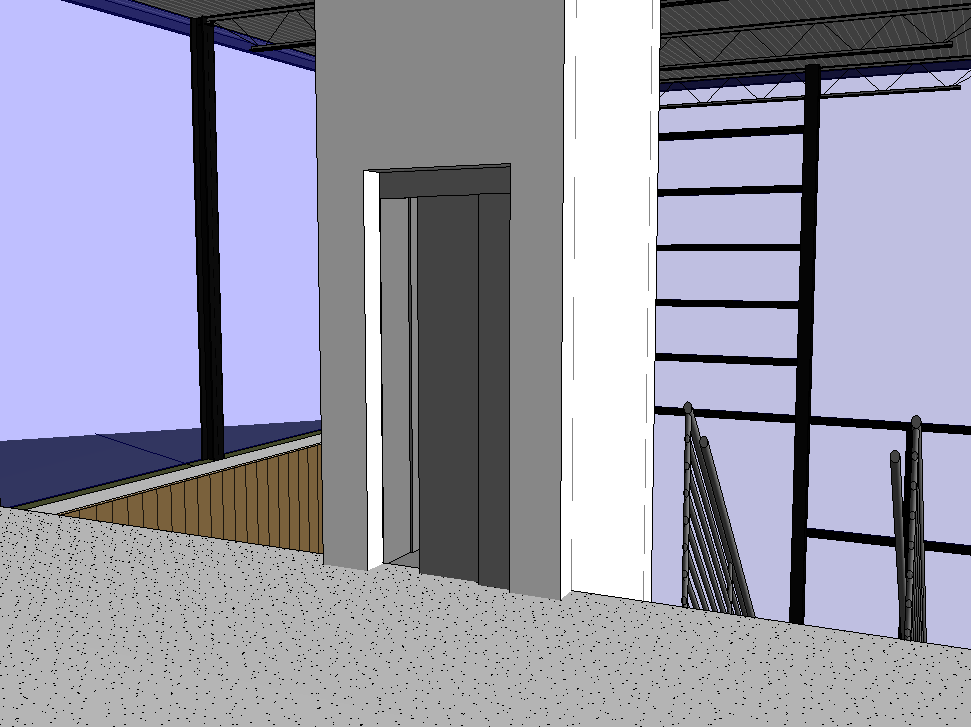
Add Guardrails
- Open the
Second Floorplan view. - On the architecture tab click on the
Railingtool. Select theGuardrail - Pipetype. - Place 3 railings as shown below. These all need to be done separately since Revit requires railings to be contiguous.
- Open the
Second Floor - Elevator3D view to check your work. (Pay attention to the side of the railing the hand rail is on and flip if needed)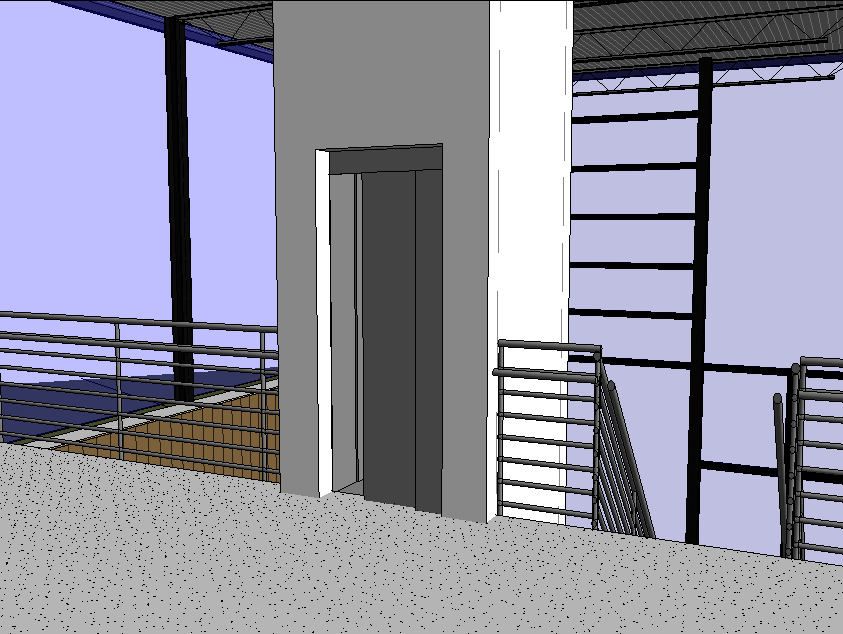
Save your file
Save your file as Spring2024_3262_firstinitial_lastname_LAB04_EX04.rvt