Modifying Family Definitions
Files you'll need to complete this Lesson
In this lesson we will use an existing component family to adapt them for future uses. We will add new forms and change instance parameters for these families. We will assign new materials and add dimension properties. We will also define new component family types and load them into our projects.
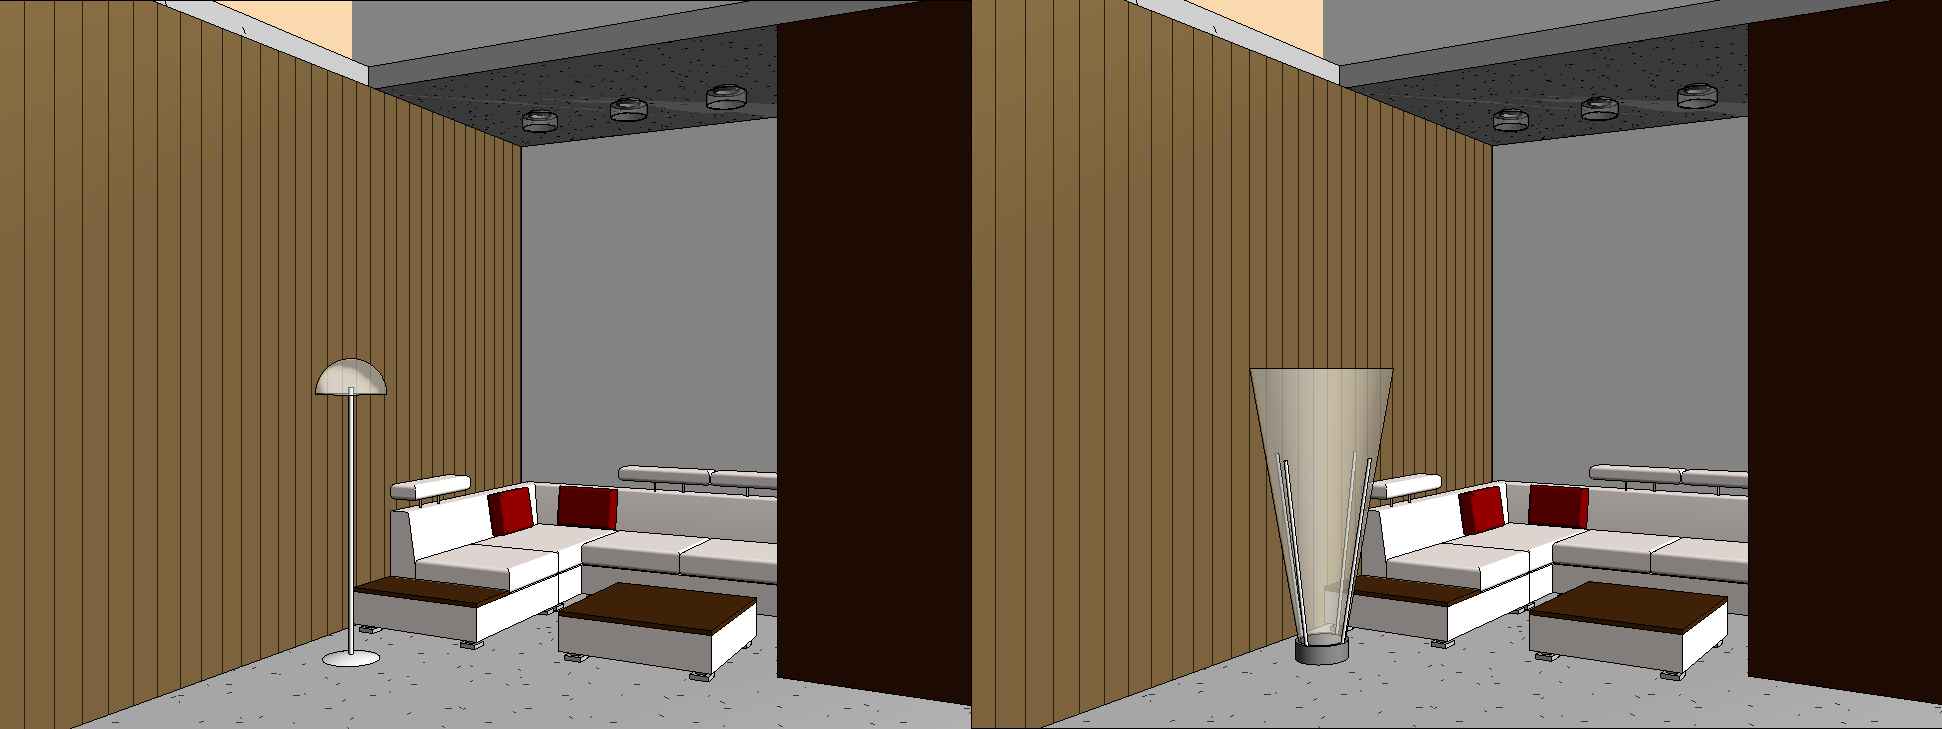
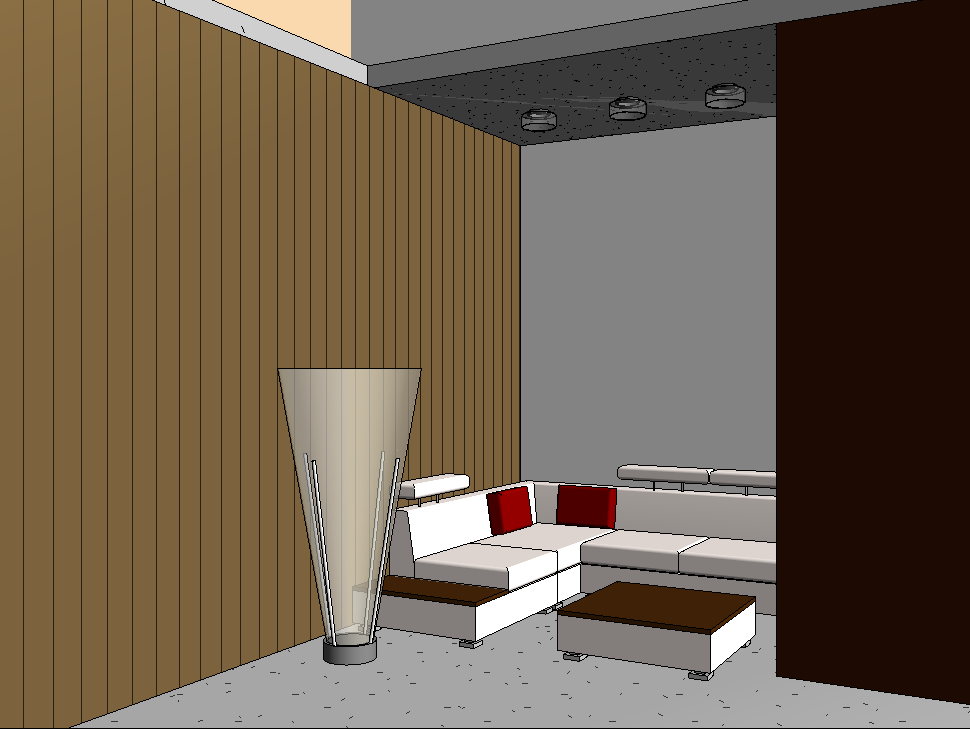
See Before and After of the lamp:
Getting Started
Make sure you have the source files downloaded for this exercise. You can get them with the links above.
Duplicate the Existing Lamp Family
- Open the Revit file:
Lab05_E2_Modifying Family Definition.rvt - Open
Residence - Sofa and Lamp View3D view. - Click on the Lamp then click on the
Edit Familybutton on the ribbon. This launches the Family Editor mode of revit, it's similar but different than the Project space you've been in before.
- Click on
File -> Save As -> Familyand save the family asFloor Lamp - Modernsomewhere you can remember it. This saves your revit family as a.rfafile that can be used in as many projects as you want. So when you make changes to the family it will update in all instances in other projects once you relink.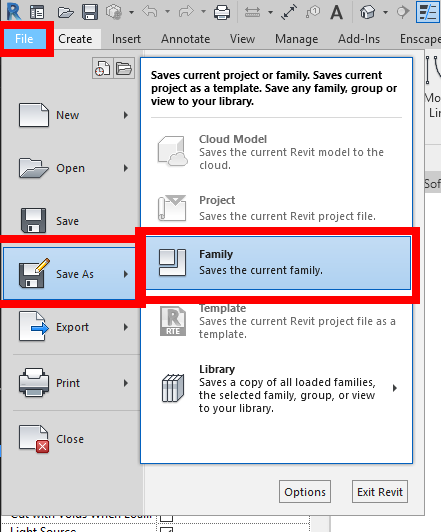
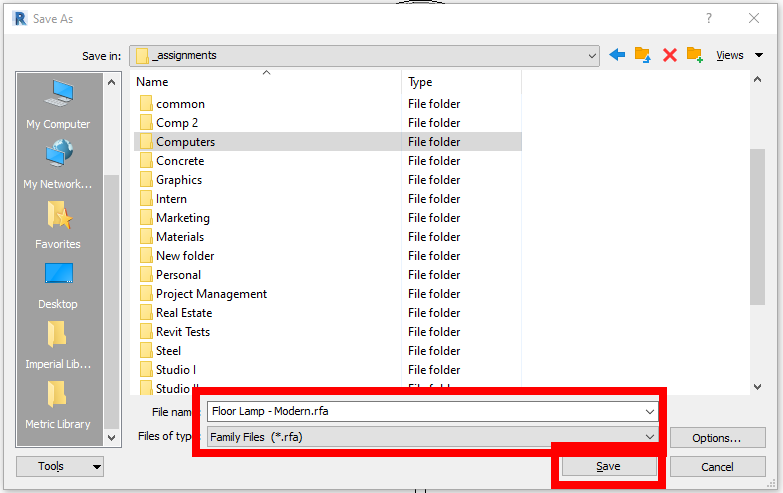
- Click
Save
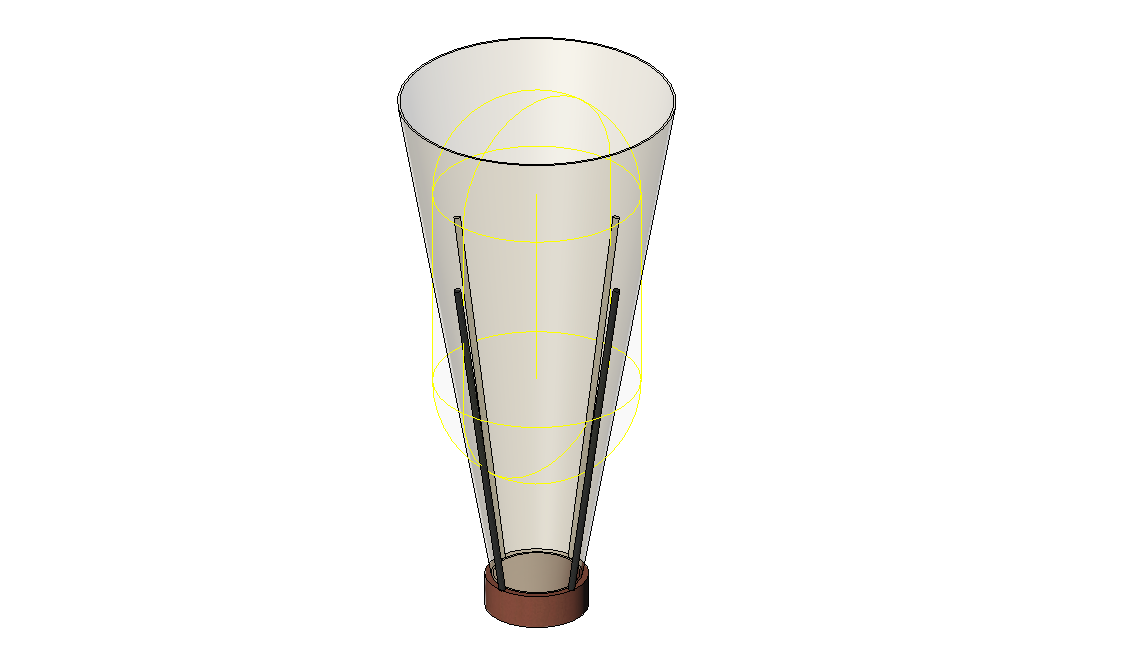
Modify the Lamp Shade Form
- Select and delete the center pole element.
- Select the lamp shade element. (The black dome shape)
- Open the
FrontElevation view. - Click on the
Edit Revolvebutton on the ribbon Modify tab
- Delete existing magenta sketch lines.
- Draw A line starting
5"away from the center axis and4"above the ground line at an80 degreeincline ending at the dashed green line at the top as shown below: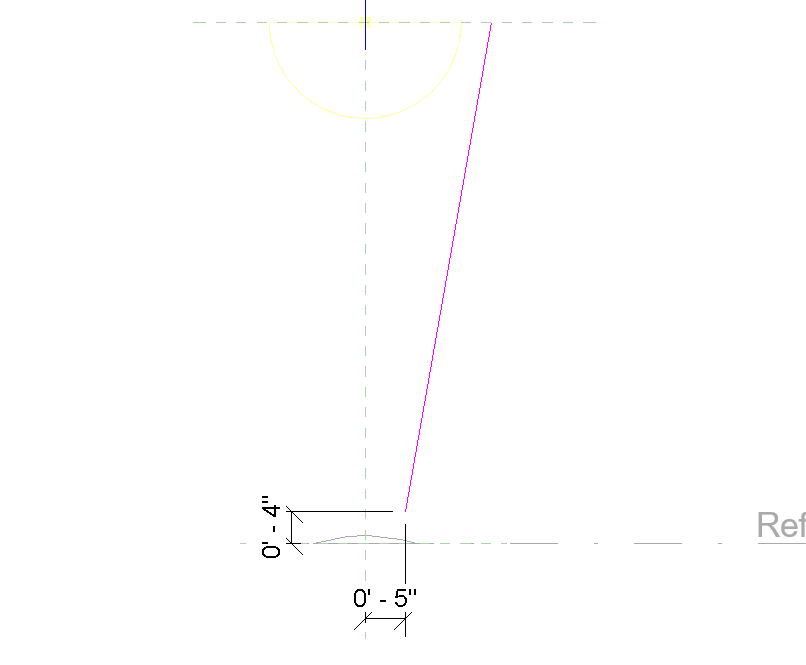
- Use the offset tool by typing
OFto offset the line by1/4". - Close off the ends of the two lines.
- Click on the green checkmark to finish editing the revolve.
Modify the Lamp Base Form
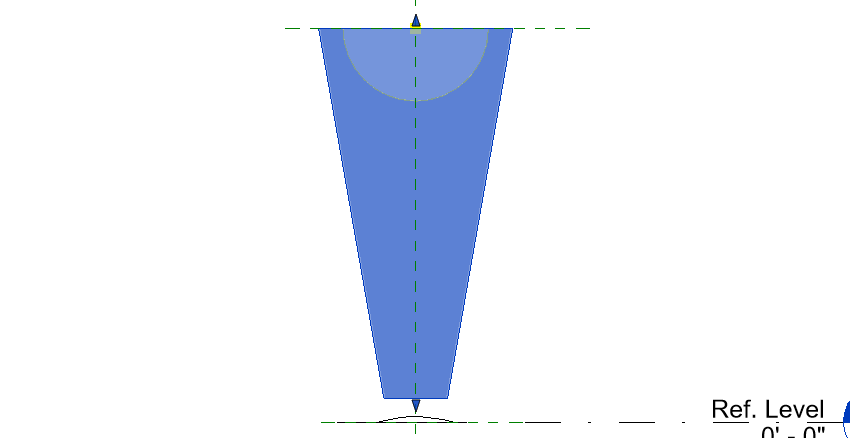
- Open the
FrontElevation View. - Select and delete the existing lamp base.
- Open the
Ref. Levelplan view. - On the Create tab select the
Extrusiontool. Then select theCircledraw mode. - Set the center of the circle to the intersection of the green lines (The origin of the family) and set the diameter to
6". - In the properties palette set the
Extrusion Endto0' 4"and set theExtrusion Startto0' 0".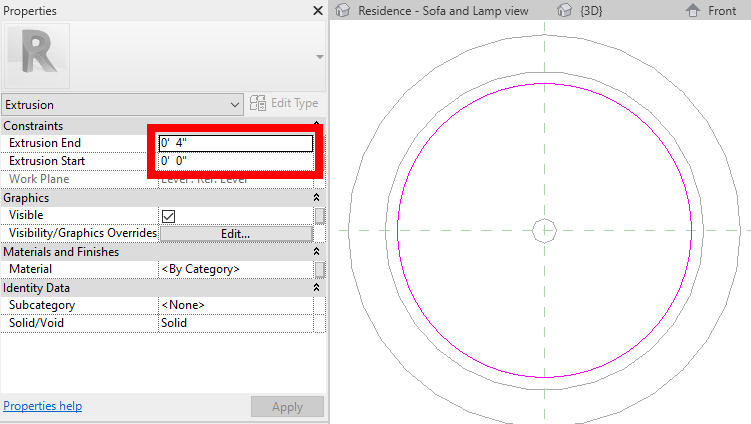
- Click on the green checkmark to finish and create the geometry.
- Open the
FrontElevation View to confirm progress.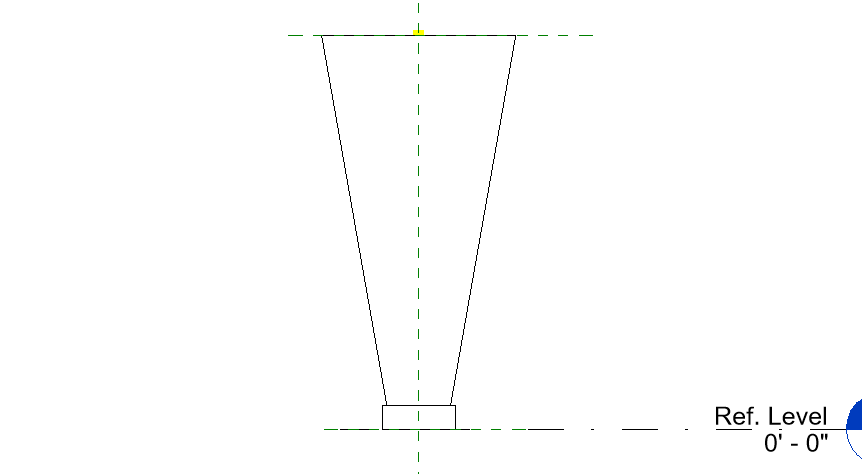
Add Support Brackets to Lamp Shade
- Open the
FrontElevation View. - On the Create tab click on the
Sweeptool.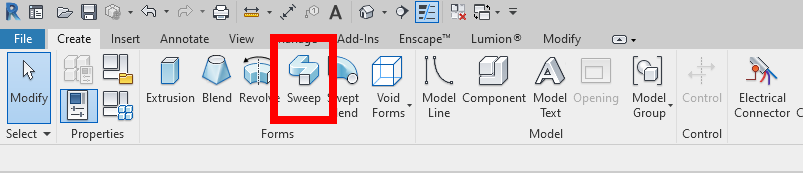
- On the Modify | Sweep tab click on the
Sketch Pathbutton.
- Use the Name option and select
Reference Plane : Light Source Axisas your reference plane. - Trace the lamp shade, to create a
3' 6"line starting at the base. - Click on the green checkmark once to finish the sweep path.
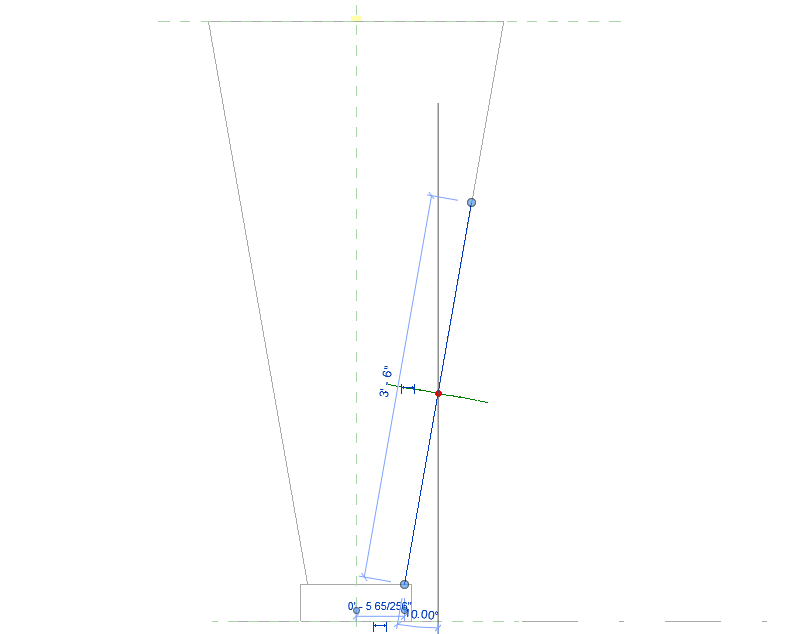
- Click on the
Select ProfilethenEdit Profilebuttons on the ribbon Modify tab.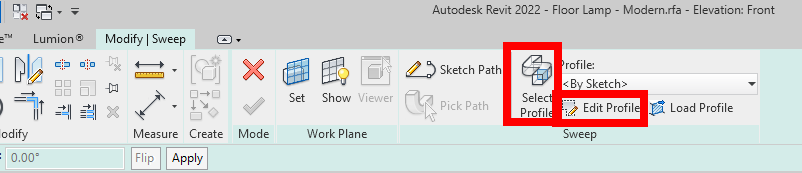
- Click on the
3D View: {3D}3D View when prompted. - Zoom in on the red dot and draw a circle with a radius of
3/8"and located just outside the shade.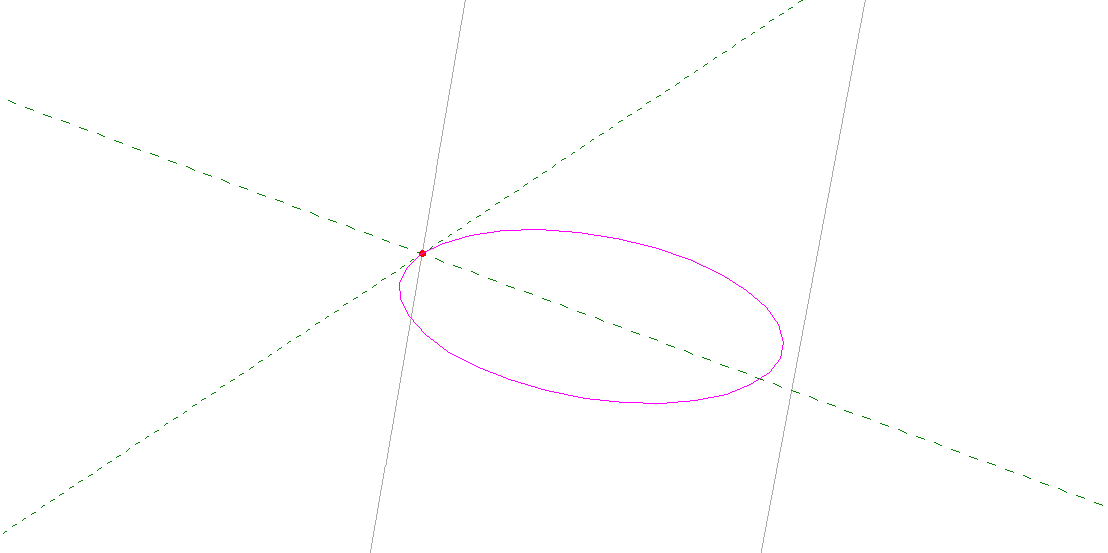
- Click on the finish (green checkmark) button twice to finish and place the geometry.
- Open
View 13D View and confirm progress.
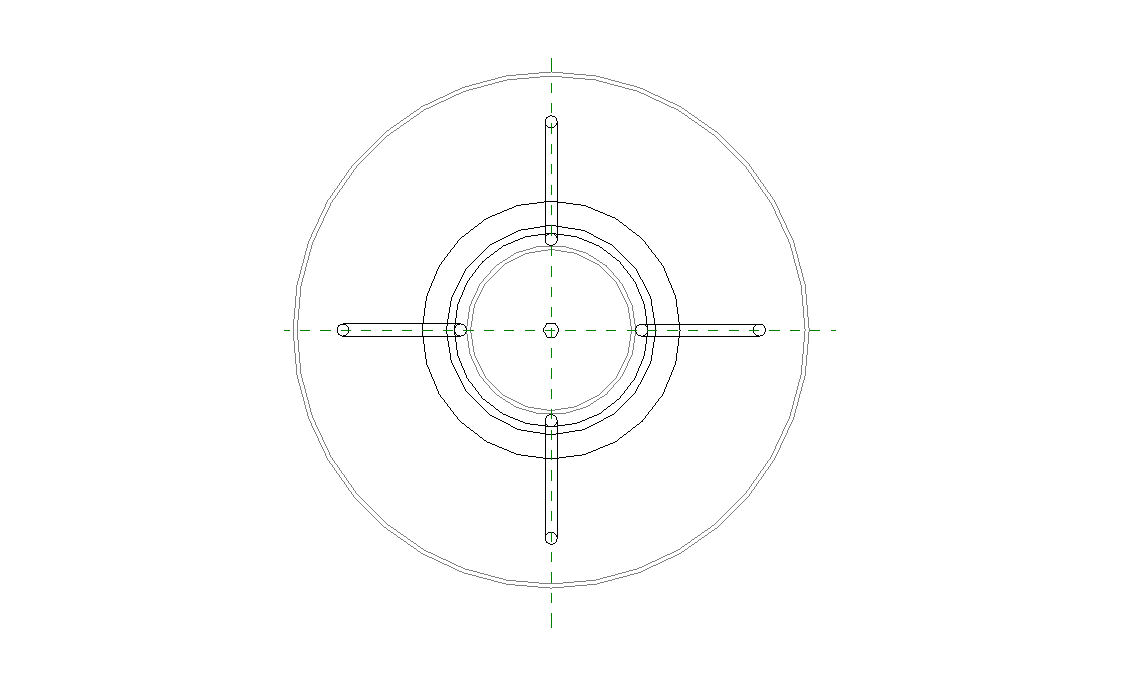
- Now to array the bracket to make 4 identical ones. Open the
Ref. Levelplan view. - Note that you can't see the bracket, that's because it's behind or underneath the lamp shade. You can see it if you set the visual style to Wireframe. Do that.
- Select the now visible bracket then click on the
Arraytool. Set the array mode toRadial. Set theNumberto4. Click on thePlacebutton to place the center of rotation at the center of the lamp.
- For your start click in the direction of your first bracket, then 90 degrees upwards as shown. Finish the changes.
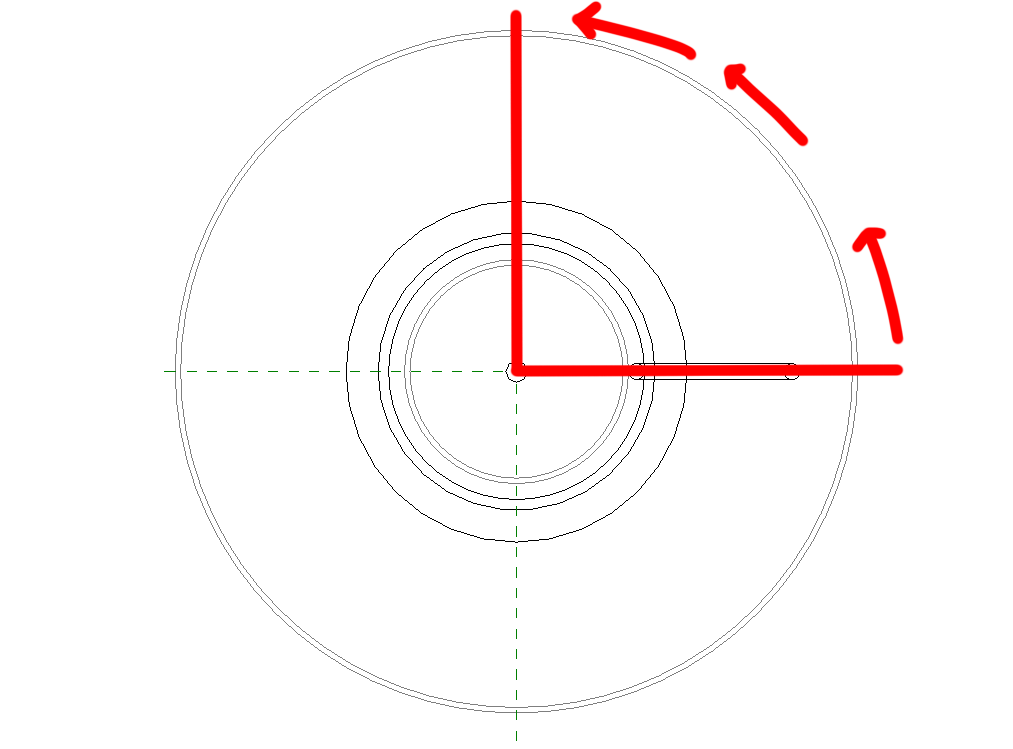
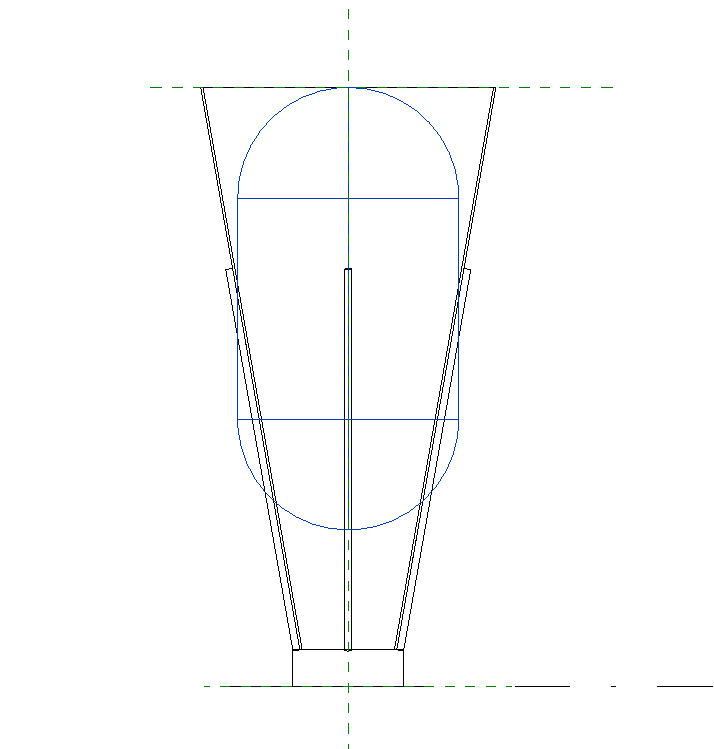
- Confirm as shown below:
Modify Light Source Definition
- Open the
FrontElevation View. - Select the Light Source Object. Again this is easier in wireframe mode.
- Click on the
Light Source Definitionbutton on the ribbon.
- Select the
Lineshape and theSphericaldistribution. ClickOK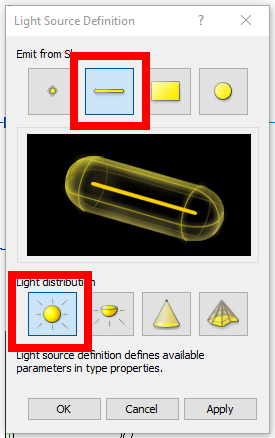
- Click on both of the padlock icons to unlock the light source constraints.
- Rotate the light source 90 degrees to be vertical.
- Move the light source down by
2' 0" - See light source final position:
Assign Materials to Lamp
- Open the
FrontElevation View. - On the Mange tab click on the
Materialstool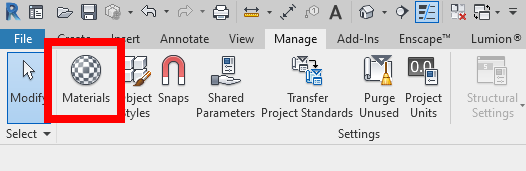
- Right Click on the
DefaultMaterial and click onDuplicate. Name the new MaterialModern Lamp Base - Open the Asset Browser (layered rectangle button at bottom left of material browser) and double click on the
Walnut - Natural Polishedmaterial. This will set theModern Lamp Basematerial to the same properties asWalnut - Natural Polished.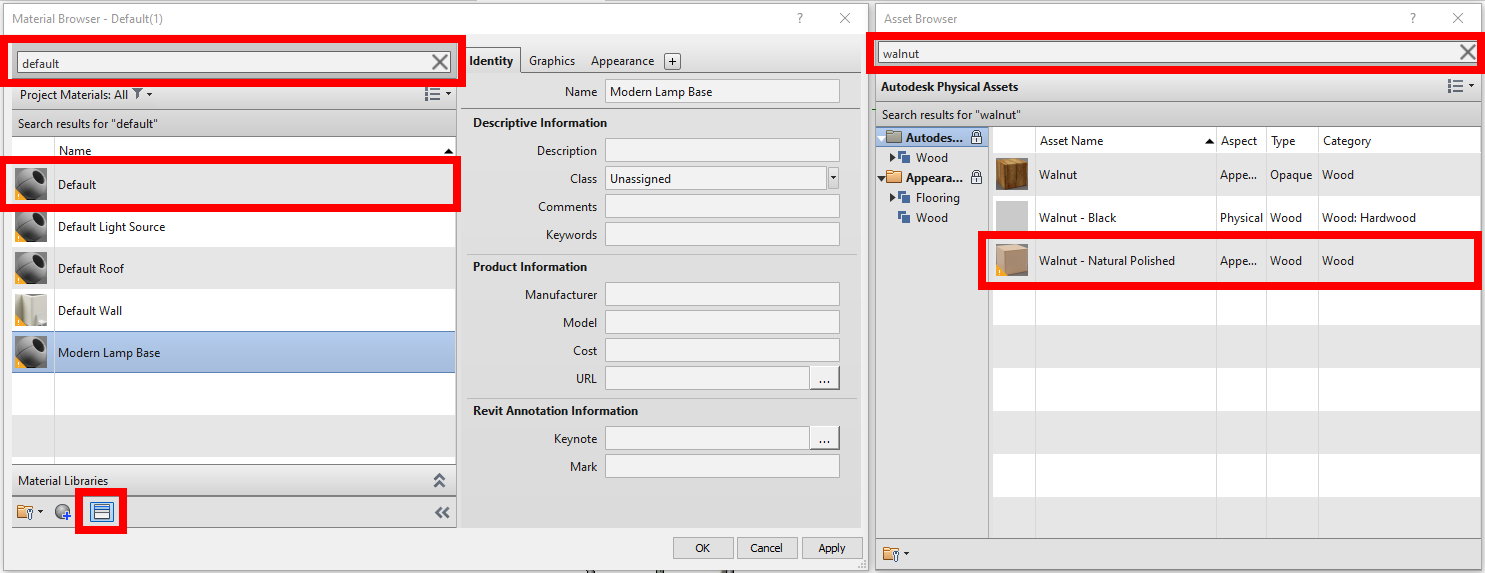
- Close the Asset Browser, but keep the Material Browser open.
- Duplicate the
Glass - Frostedmaterial and name itModern Lamp Shade - Click
OKto exit the Material Browser. - Open the
{3D}3D View. - Set visual style to
Realistic - Select the
Lamp BaseComponent and set the material value in the properties palette toModern Lamp Base - Select the
Lamp ShadeComponent. Click on the=sign to the right of the material field then select<none>. - Set the Material to
Modern Lamp Shadelike in step 11. - Click on the
Bracketcomponent and then click onEdit Groupon the ribbon. Select the component again, and assign the material toMetal - Chrome. - Click Finish and see finished lamp below.
- Save the Family.
Load the New Family Into Your Project
- On the Modify tab click on the
Load into Projectbutton on the ribbon.
- If prompted select the
Lab05_E2_Modifying Family Definition.rvtRevit file. - Open
Residence - Sofa and Lamp View3D view. - Hit
escto exit the placement command since we're just going to replace the old lamp with this new family. - Click on the old lamp and change it's type in the properties palette to the new one that we just created. the
60W - 120Vversion. - See finished lamp below:
Save your file
Save your file as Spring2024_3262_firstinitial_lastname_LAB05_EX02.rvt