Creating Plan Views
Files you'll need to complete this Lesson
In this lesson we will create new plan views b using the Plan View tool or by duplicating existing plan views. We will then learn how to select which types of elements should appear in a plan by setting visibility graphics overrides. We will learn how to crop views, adjust the view range, clipping plane, etc.. We will also learn how to set an underlay in a view for seeing the floor below. We will also change the scale of a plan view and adjust the detail level shown.
Getting Started
Make sure you have the source files downloaded for this exercise. You can get them with the links above.
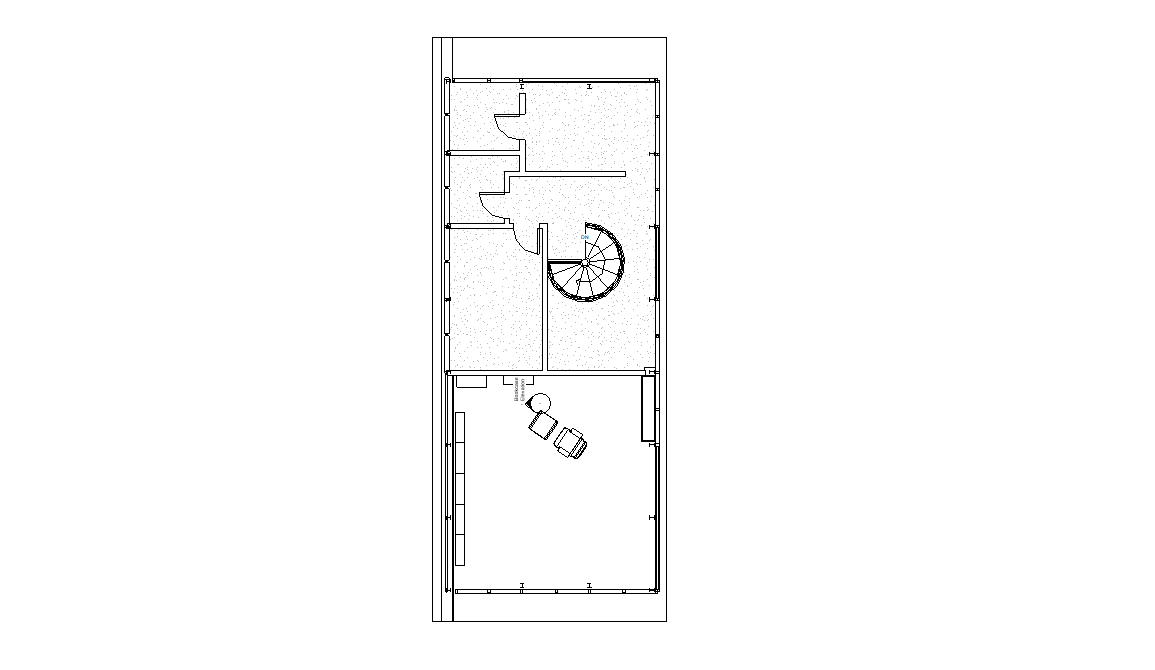
Create a Structural Plan View
- Open the
Lab06_E1_Creating Plan Views part.rvtRevit File. - Open the
First Floorplan view. - Duplicate the
First Floorplan view by right clicking on it in the Project Browser. Then selectingDuplicate View -> Duplicate - Rename the copied version to
Level 1 - Structuralby right clicking on the new view and selectingRename... - Open the new
Level 1 - Structuralview if it's not already open. - On the view tab click on the
Visibility / Graphicsbutton. Or use the shortcut by typingVG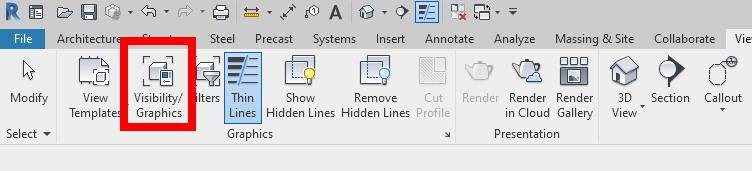
- Uncheck
FurnitureandFurniture Systemsin the visibility column. ClickOKto confirm. - Since this is a structural view it would be nice if the columns appeared in a heavier line weight. Open the
Visibility / Graphicsmenu again like before. Scroll down and expand theStructural Columnscategory. - Click on the
Override...button in theCut > Linescolumn. (It may be invisible until you click in the cell where it should be). - Set the Line Graphics to
Solidpattern withRedcolor and8for the weight. ClickOKtwice.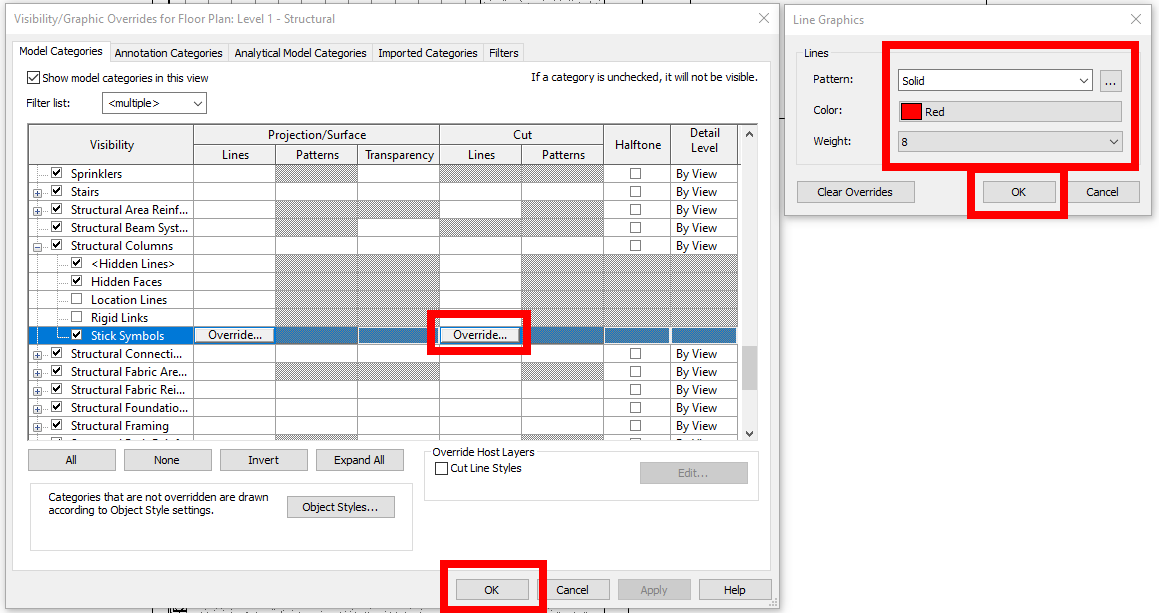
- Your columns should now be drawn in thick red lines. If the thickness is not changed, check that you are not in
Thin Linemode.
Create a Furniture Plan View
- Duplicate the
First Floorplan view again. - Rename the copied version to
Level 1 - Furniture. - Open the new
Level 1 - Furnitureview if it's not already open. - Open the
Visibility / Graphicsmenu and we want to set everything that isn't furniture to a half tone. To do this scroll down toFurnitureandFurniture Systemsand select those rows by holdingCtrland clicking on both of them. - Once selected click on the
Invertbutton. This will select everything that wasn't selected already in the list. - Now click on the
Halftonecheckbox on any of these selected rows and it will apply the option to all of them. ClickOKto confirm.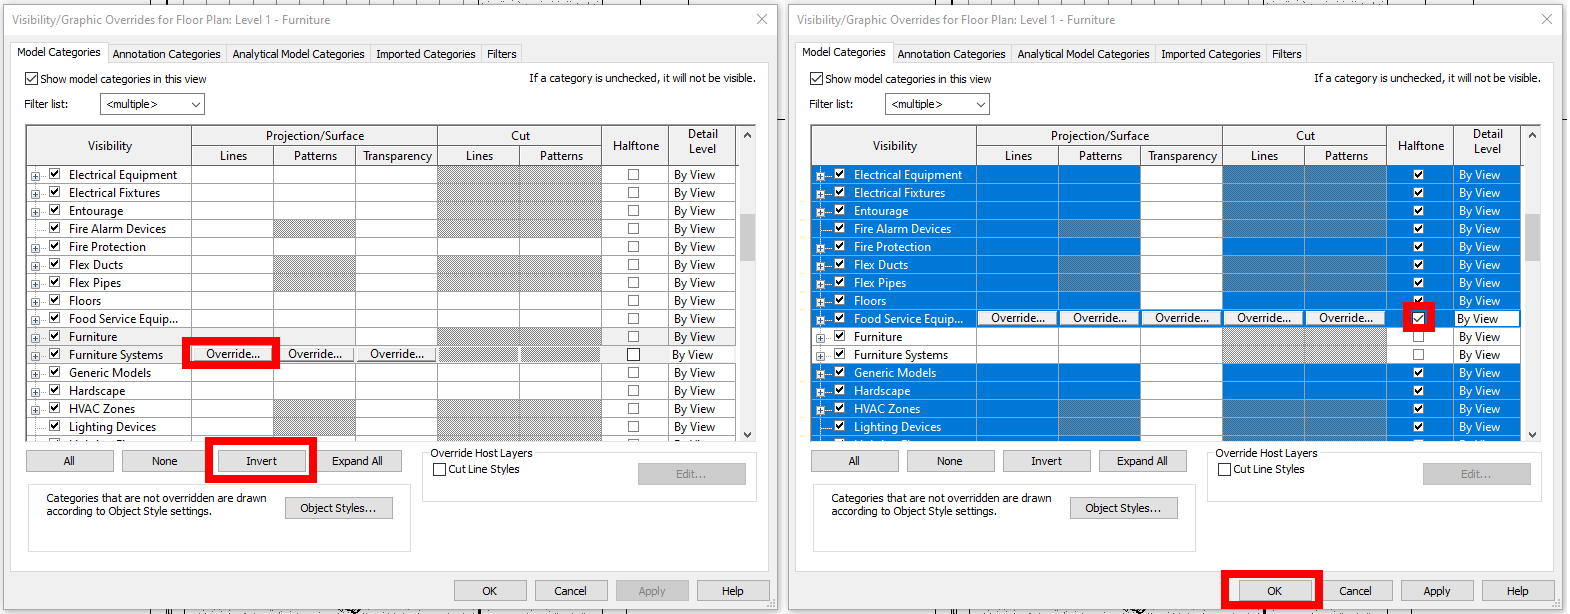
- Use the steps we took before to give the furniture items a
SolidOrangeline with a weight of6for theProjection/Surface > Linescolumn. ClickOKto confirm.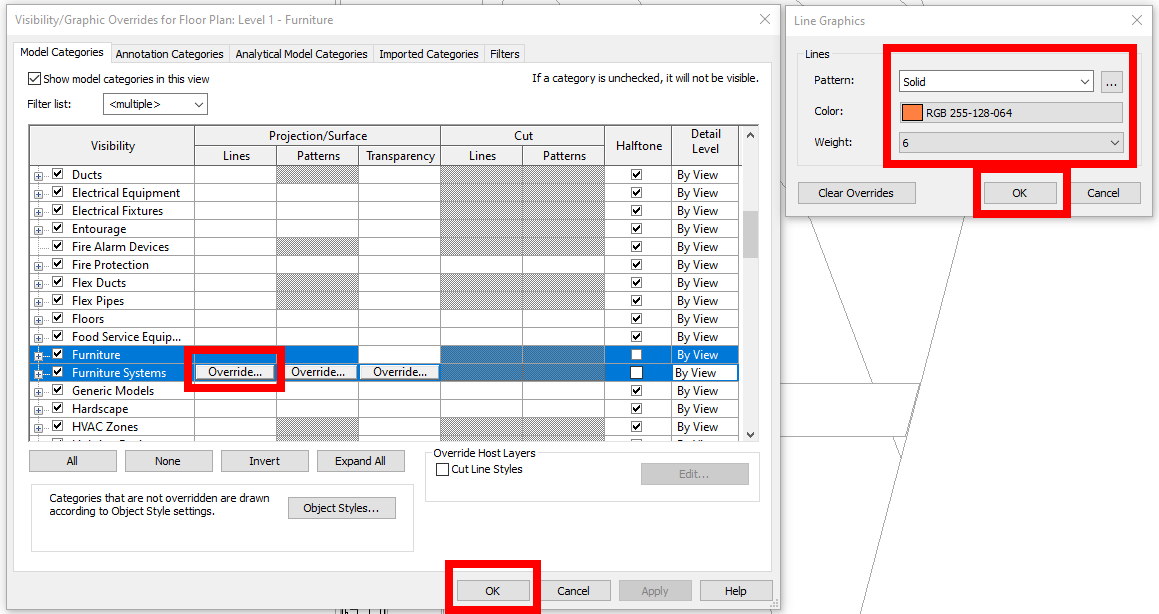
- All furniture should now be Orange.
Create a Level 1 Residence Only Plan View
- Duplicate the
First Floorplan view again. - Rename the copied version to
Level 1 - Residence. - Open the new
Level 1 - Residenceview if it's not already open. - Click on the
Show Crop Regionbutton below the viewport to show the view extents.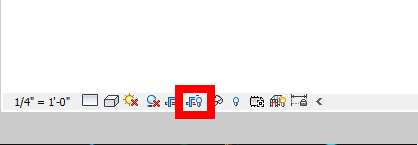
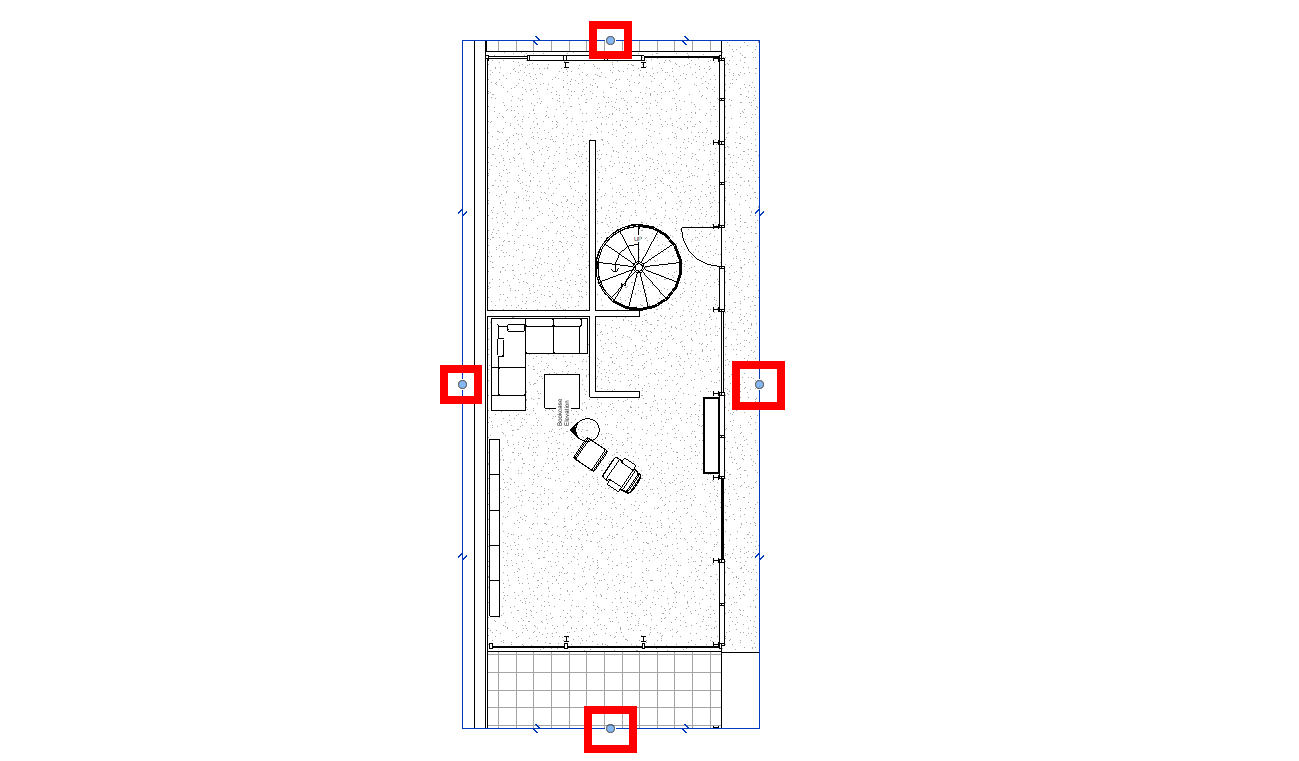
- Use the blue circle handles to shrink the view extents down to focus only on the residence
Create a Level 2 Residence View
- Repeat the steps we took to create the
Level 1 - Residenceview but for theSecond Floor. - Notice that we can't see down into the first level. Let's fix that. Scroll down in the Properties palette to the Extents section and click the
Edit..button next toView Range. - Set the
View Depth -> Leveldropdown toLevel Below (First Floor). ClickOKto confirm.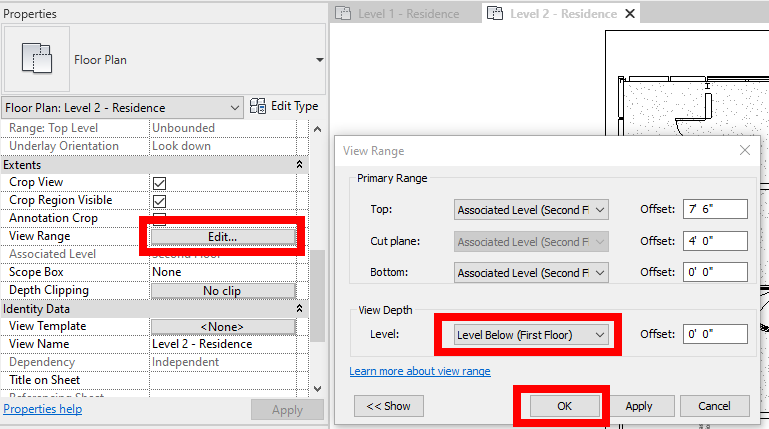
Save your file
Save your file as Spring2024_3262_firstinitial_lastname_LAB06_EX01.rvt