Creating 3D & Section Views
Files you'll need to complete this Lesson
In this lesson we will learn how to duplicate the default 3D view to create additional orthogonal views. We will also use the ViewCube and the SteeringWheels widgets to change the view settings. Next we will use the Selection Vox to create 3D versions of our plan and section views. We will also learn how to create and edit Perspective views.
Getting Started
Make sure you have the source files downloaded for this exercise. You can get them with the links above.
Use the Camera Tool to Create a Perspective View
- Open the Revit File
Lab06_E3_Creating 3D Views.rvt. - Open the
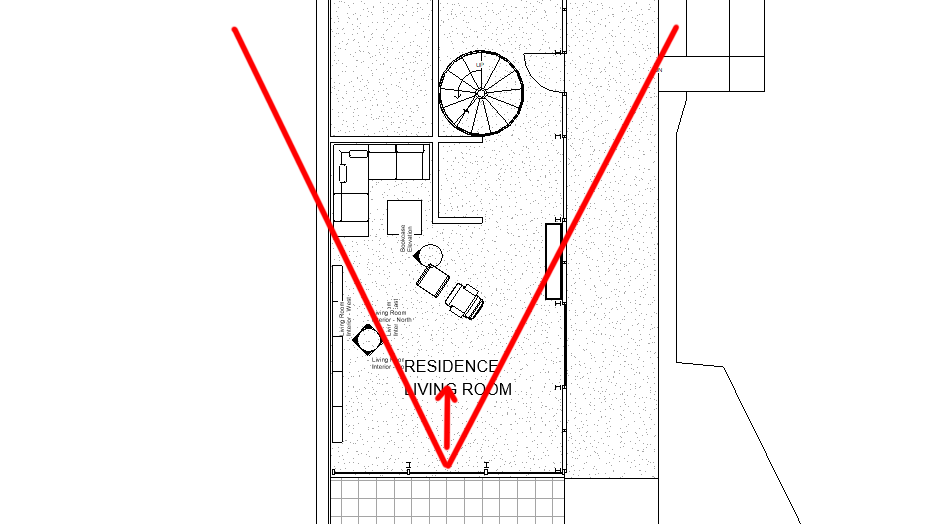
First Floorplan view and zoom into the Residence Living Space. - On the view tab click on the little arrow below the
3D Viewbutton to select theCameraTool. - Click near the south edge of the room to place the camera there and then click the second time just beyond the extends of the living room space facing the camera north.
- Open the automatically created
3D View 1if it doesn't open for you. - Set the crop region to a 16:9 aspect ratio by clicking on the crop bounds then click on the
Size Cropbutton on the ribbon.
- Set the width to
16"and the height to9" - Rename the 3D view to
Living Room Interior
Create a Section View
- Open the
First Floor - Residenceplan view. - On the view tab click on the
Sectioncommand and create your extends as shown below by clicking near the bottom of the plan then near the top. Make sure that the section extents are pointing to the left. If they aren't there is a swap button to flip it.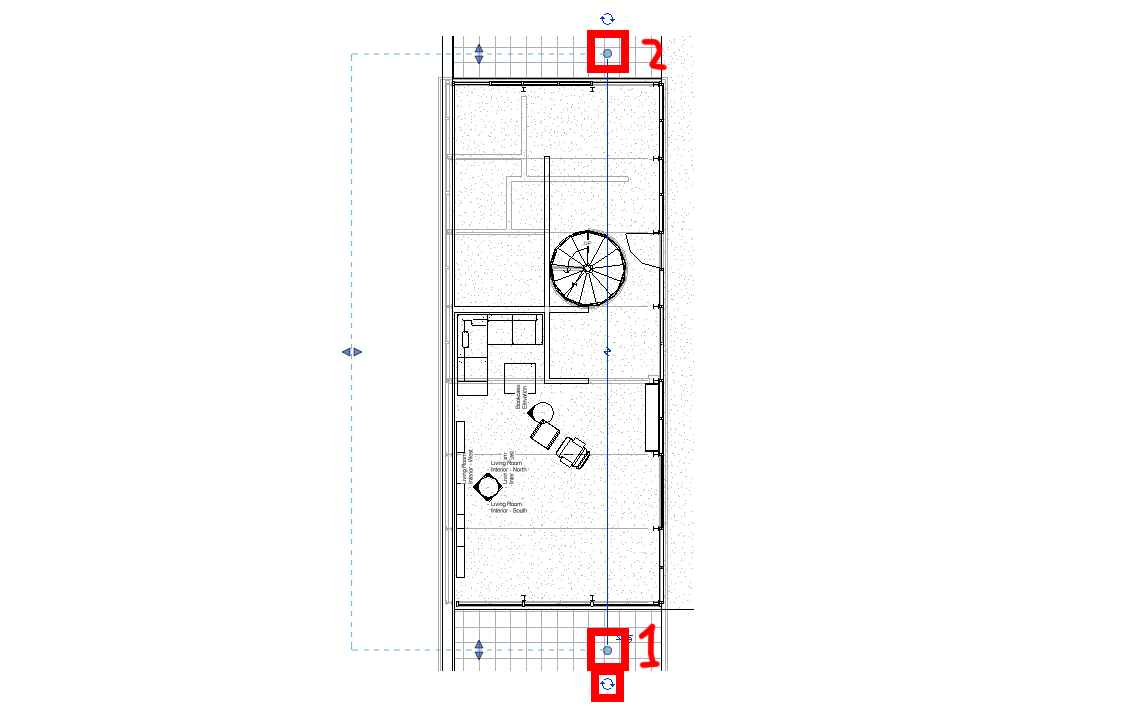
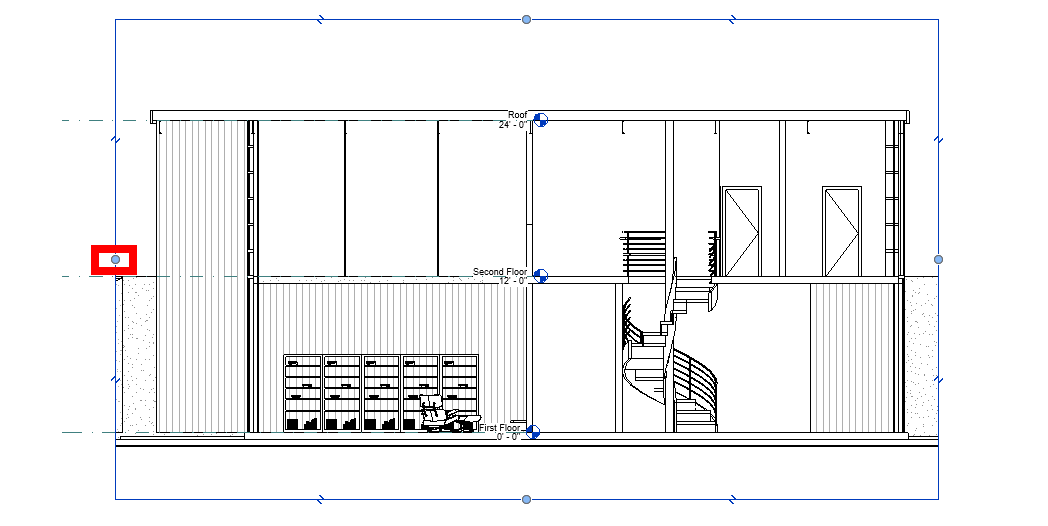
- Open the
Section 1Section view. - Select the crop region and drag the left drag grip to the left to show the entire roof canopy as shown below:
Create a 3D Section View
- Duplicate the
{3D}3D view and rename it toResidence Building. - Open the
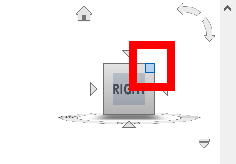
Residence Building3D View. - Right Click on the View Cube (The directional indicator at the top right of the viewport).
- Click on
Orient to View -> Sections -> Section: Section 1.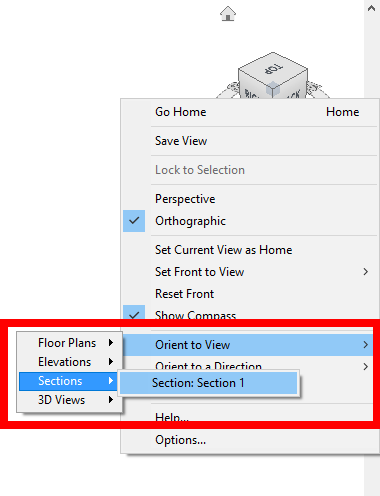
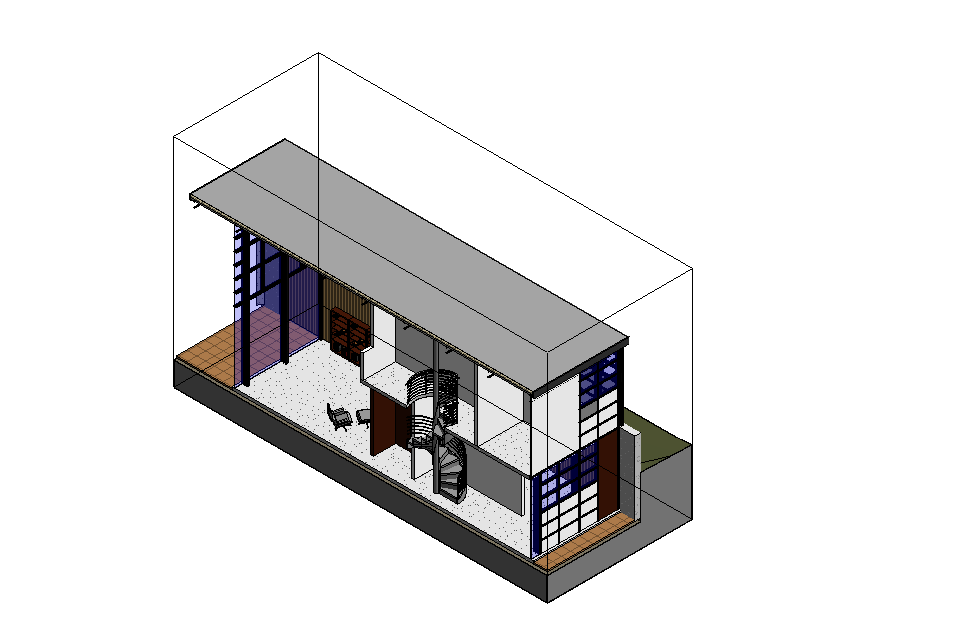
- It should crop and orient the view to look like this:
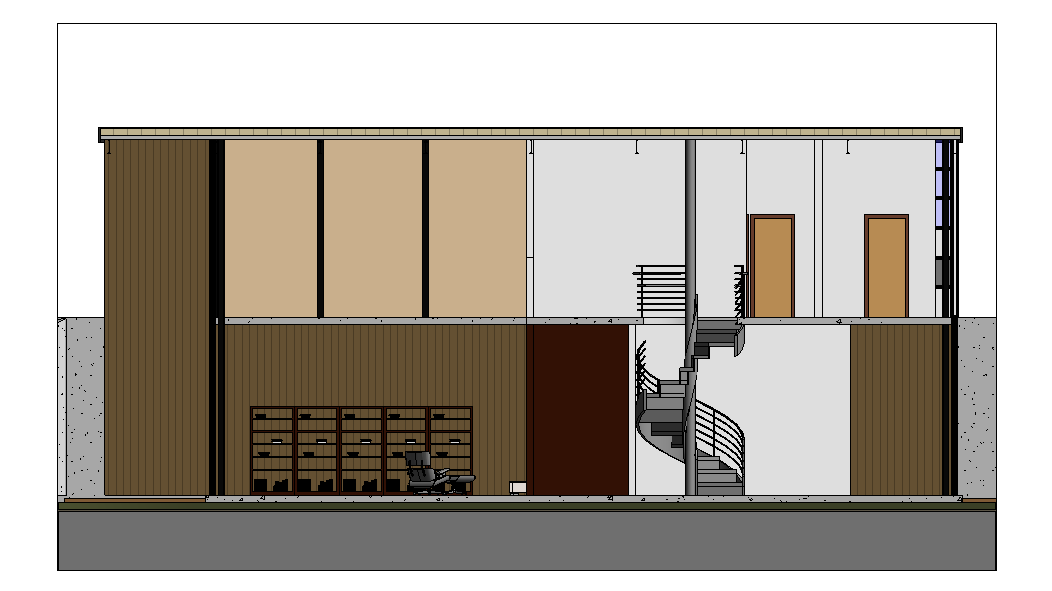
- Click on the upper right hand corner of the View Cube to tilt the view into a more 3D orientation:
- Confirm finished view:
Note: You can click on the 3d crop boundary to adjust the view even more if you like
Save your file
Save your file as Spring2024_3262_firstinitial_lastname_LAB06_EX03.rvt