Adjusting Element Appearances in Views
Files you'll need to complete this Lesson
In this lesson we will learn how to use the View Control bar to quickly change a view's display properties. We will also learn how to enable shadows and to specify the location of the light source. We will also learn how to set the location of the building to form an accurate solar study. Finally we will use the Graphics Display options to enhance the silhouettes of elements and add gradient backgrounds to 3D views.
Getting Started
Make sure you have the source files downloaded for this exercise. You can get them with the links above.
Create an Exterior View Using the Camera Tool
- Open Revit file
Lab06_E4_Adjusting the Appearance of Elements in a View.rvt. - Open the
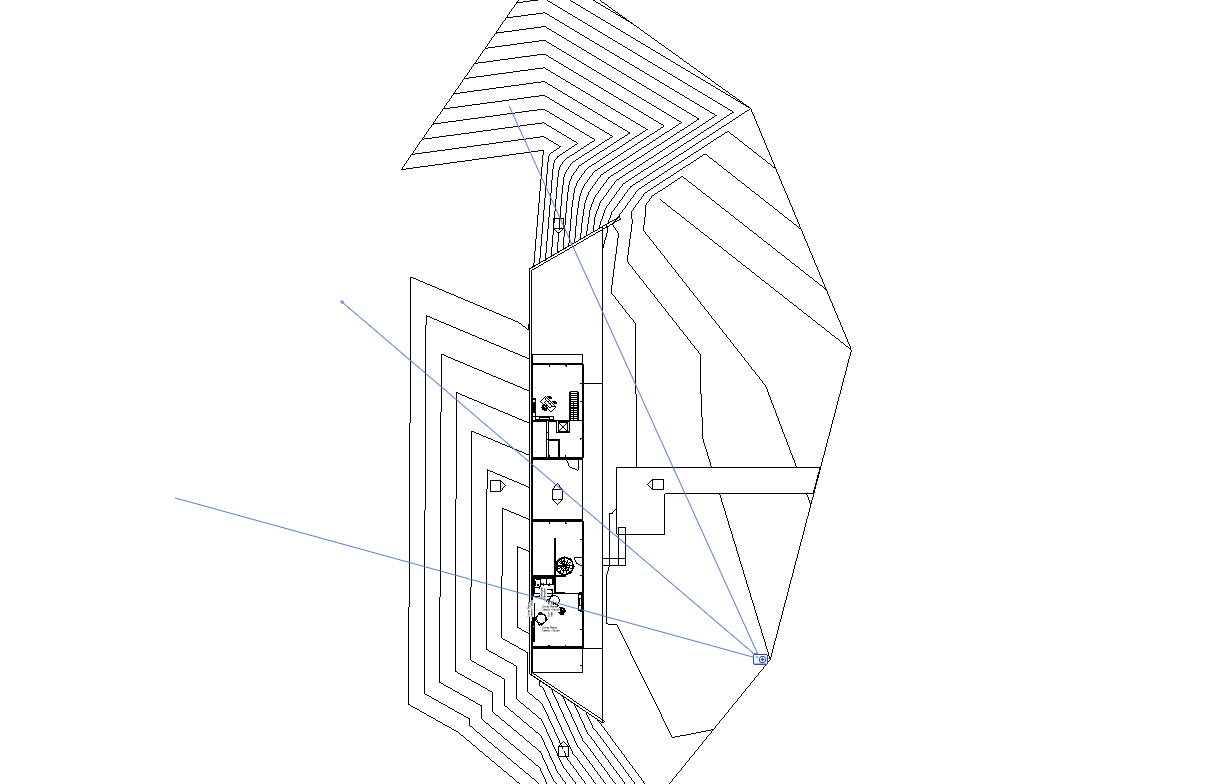
Site Planplan view. - On the view tab click on the little arrow below the
3D Viewbutton and select theCameratool. - Place a camera view about here:
- Change the frame ratio to 16:9 like in the previous lesson by clicking on the
Size Cropbutton on the ribbon and changing the width to16"and the height to9". Tip: If you double click down on the mouse button the view will be fit to the viewport. - Rename
3D View 1toExterior Perspective
Try out some of the Visual Styles.
- Click on the
Graphics Displaybutton on the View Control Toolbar (at the bottom of the viewport):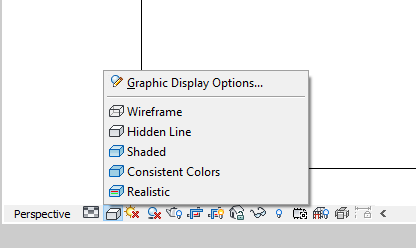
- Click through and observe every option available to you. Note that some of these options have shortcuts. See below:
- Wireframe: WF
- Hidden Line: HL
- Shaded: SD
- Apply the
Hidden Linestyle to this view.
Create a Realistic View
- Duplicate the
Exterior Perspectiveview and rename the duplicate toPerspective - Realistic - Apply the
Realisticstyle to this view.
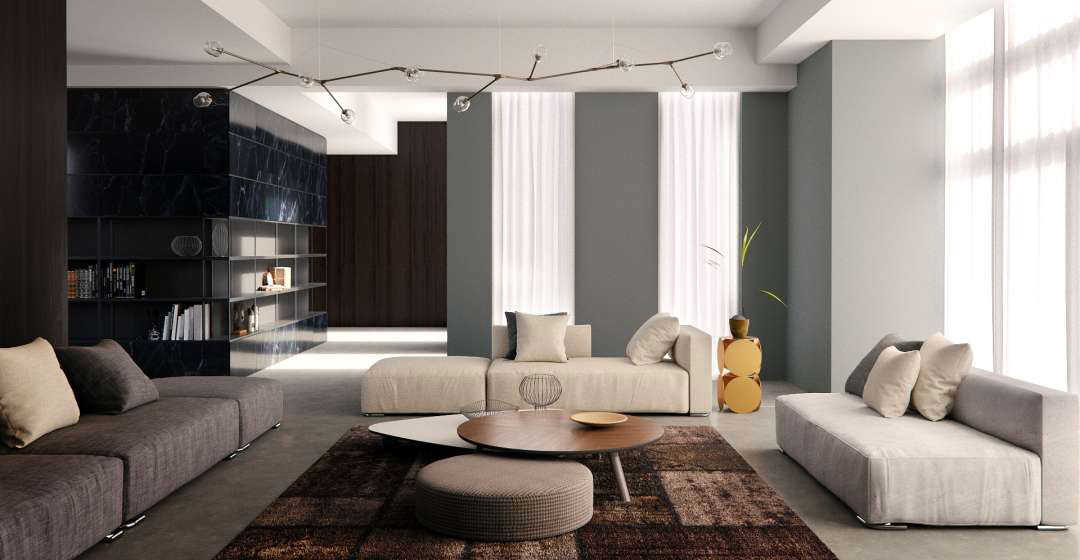
Create a Shaded View
- Duplicate the
Exterior Perspectiveview and rename the duplicate toPerspective with Shadows - Apply the
Shadedstyle to this view. - Open the
Graphics Display Optionsdialogue by either clicking on that option in theGraphics Displaybutton (same button as display mode) or by typingGD. - Expand the
ShadowsandLightingdropdowns. - Enable both
Cast ShadowsandShow Ambient Shadows. - Click on the
<In-session, Lighting>button. - Select the
StillRadio option. - Set the date to
June 1, 2019 - Set the Time to
10:00 AM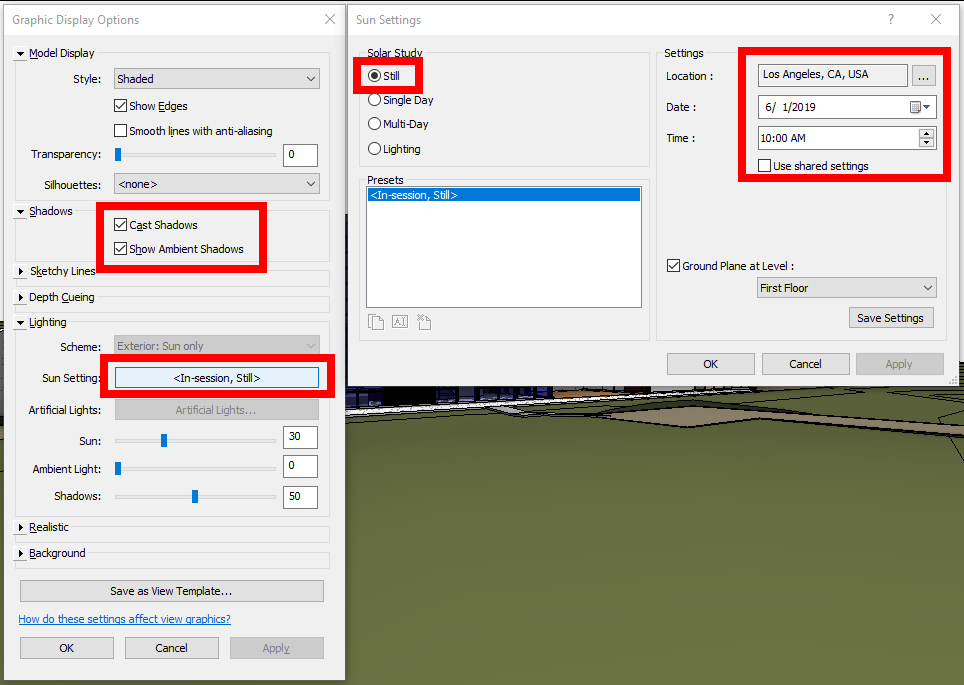
- Click
OKto accept the sun settings. - Expand the
Backgroundsection of the Graphics Display Options. Select theGradientbackground option. Make sure your color options match ours: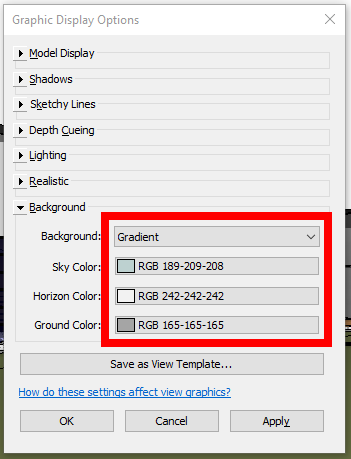
- Click
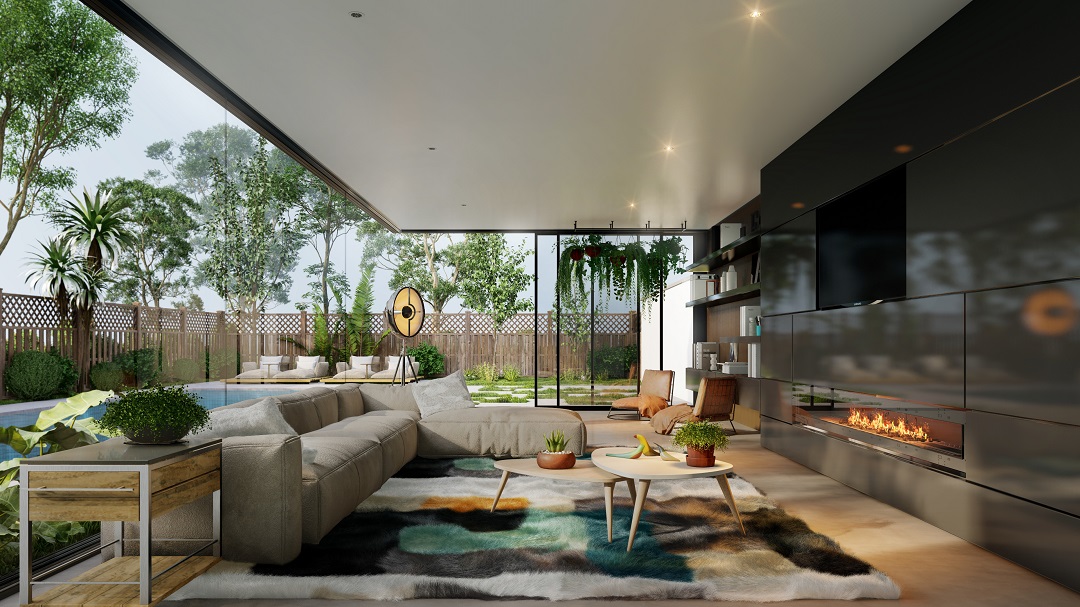
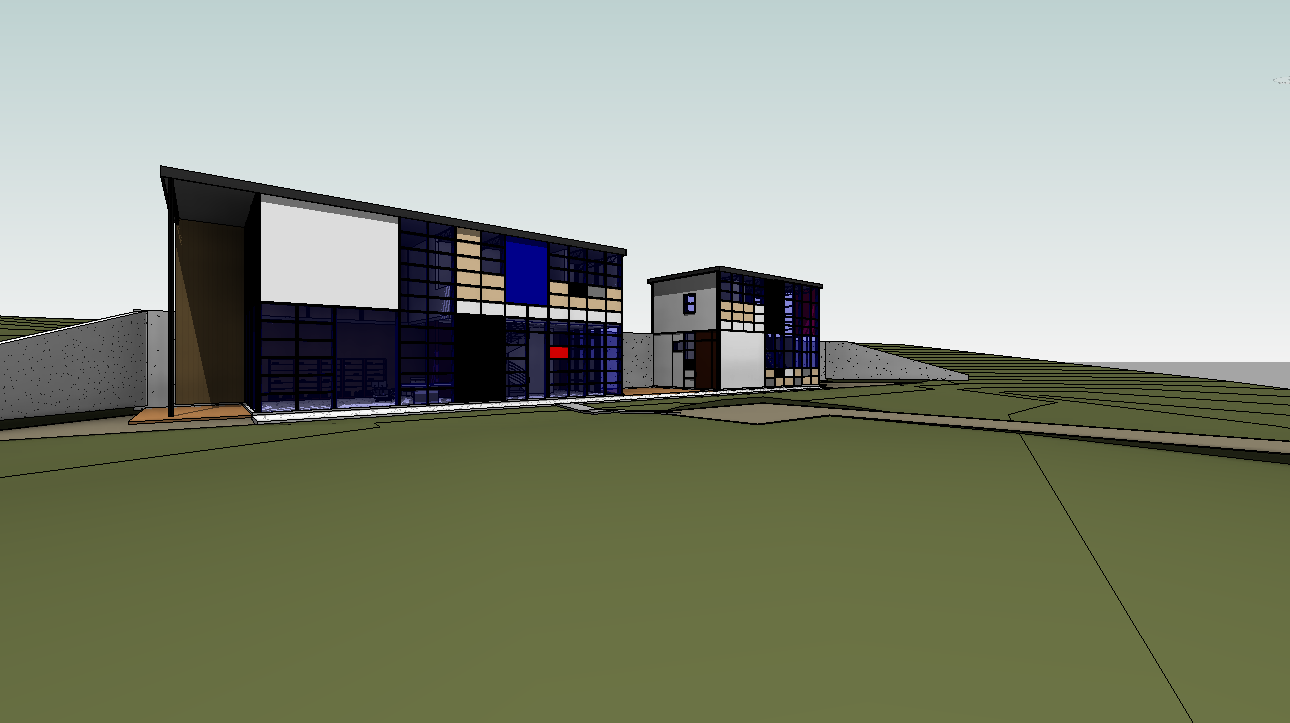
OKto accept all graphics display options. - See finished result below:
Save your file
Save your file as Spring2024_3262_firstinitial_lastname_LAB06_EX04.rvt