Assigning Render Materials
Files you'll need to complete this Lesson
In this lesson we will learn how to assign materials to model elements using object styles, type properties, and instance properties. We will also adjust the render appearance of materials to display realistic views.
Getting Started
Make sure you have the source files downloaded for this exercise. You can get them with the links above.
Assign a new Material to the Sidewalk and Ramp
- Open Revit file
Lab07_E1_Assigning Materials to a Component.rvt. - Open the
Exterior Perspective3D View. - Select the Sidewalk and note the type in the properties palette is set to
Floor: Concrete Slab - 6". This is where this element gets it's material properties.
Note: In this example we will be replacing this concrete sidewalk with a wooden deck type structure, the following steps show how to duplicate and edit structure properties of a type and how those relate to render materials
- On the properties palette click on
Edit Type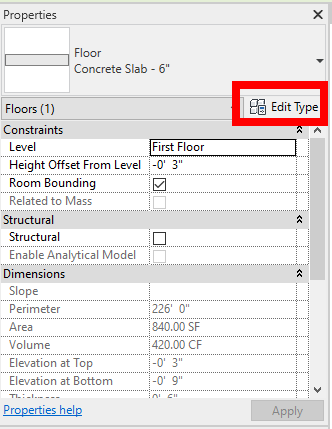
- Duplicate the type and name the new type
Wood Patio.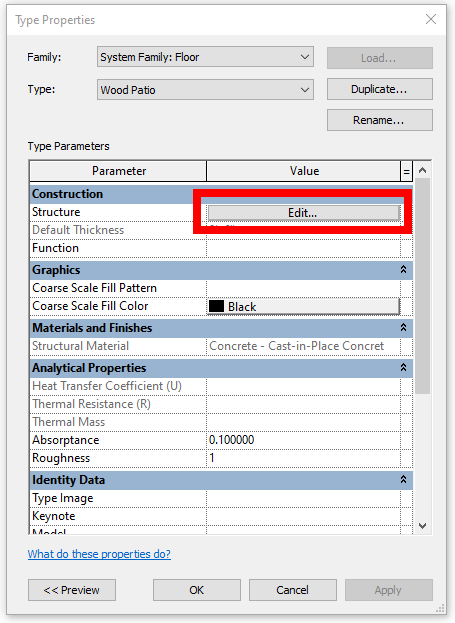
- Click on the
Edit...button next toStructureto change theStructure [1]parameters toWood Deckat a thickness of0' 4".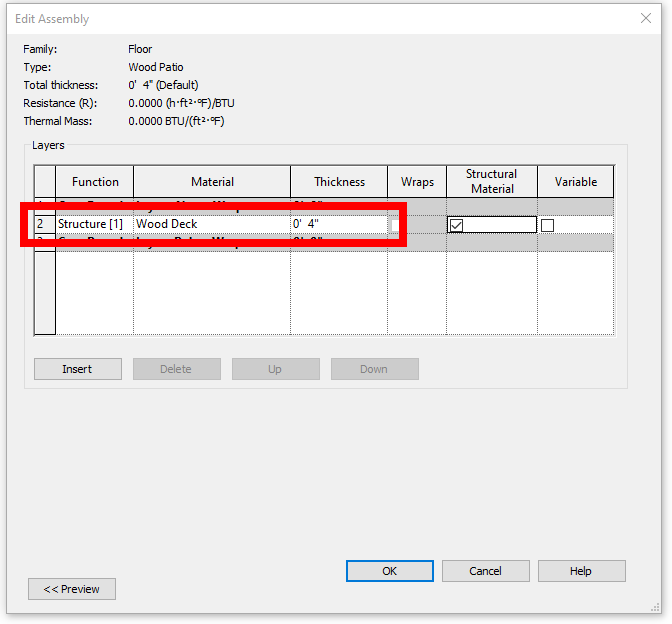
- Click
OKtwice to accept the changes. You should see that the sidewalk looks brown like wood. - Click on the Ramp Element
- In the properties palette click on
Edit Type - In the
Type Propertieswindow that opens edit the Ramp Material to match the sidewalk by setting it to theWood Deckmaterial too.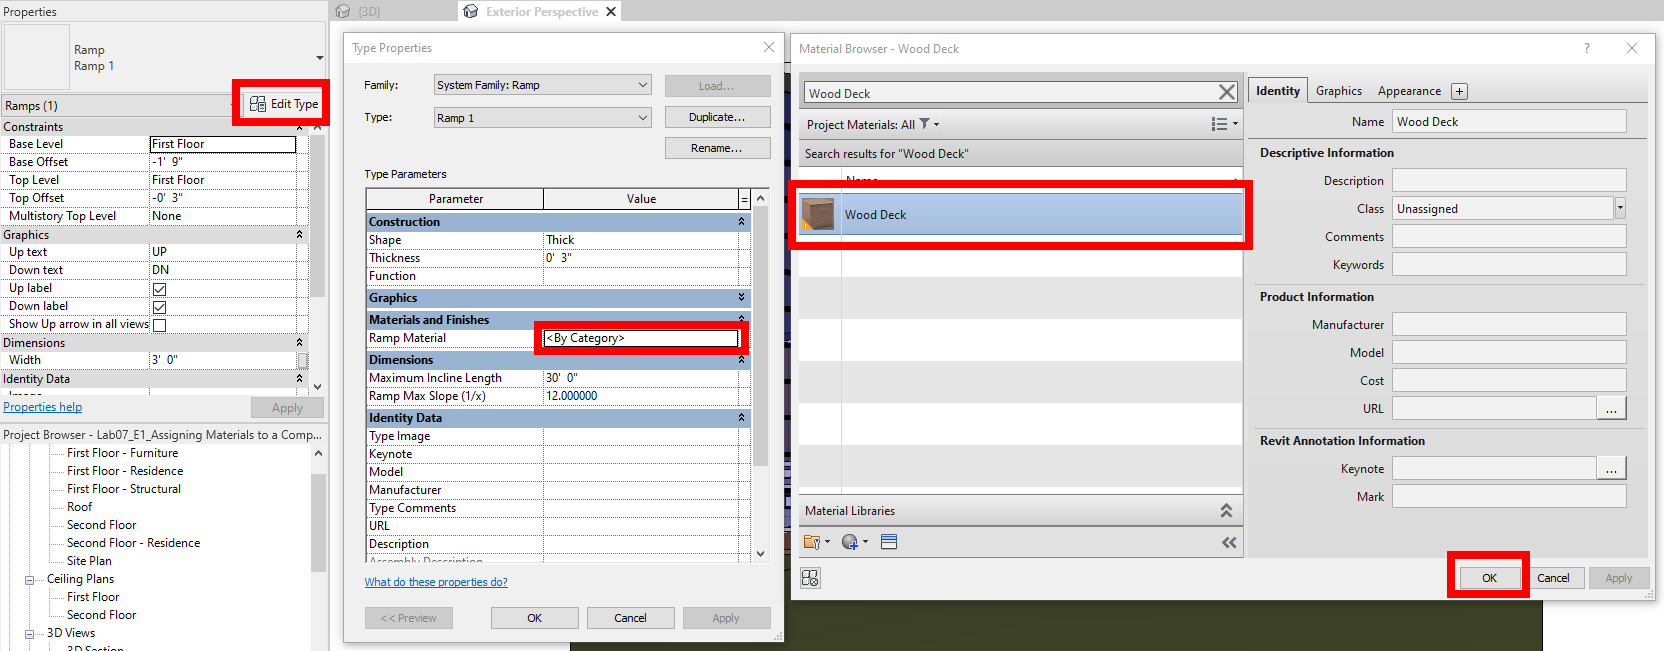
- Click
OKtwice to confirm the changes and should see that both the sidewalk and ramp are brown like below:
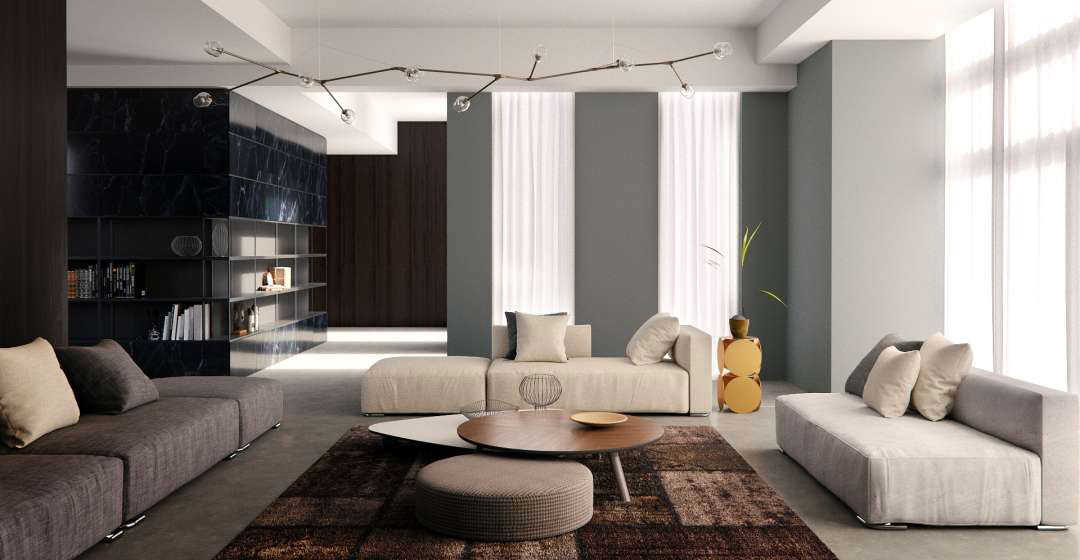
Change Materials Assigned to Console Table
- Open the
Living Room Interior3D view.
Note: we want to match the materials of the Console Table to those of the Sectional Sofa, so first we will look at what the Sofa uses, then apply the same ones to the table
- Select the
Sectional Sofa_6482family by clicking on it in the view. - In the Properties palette click on
Edit Type - Take note of the material names that the sofa is using then close out of the Type Properties window.
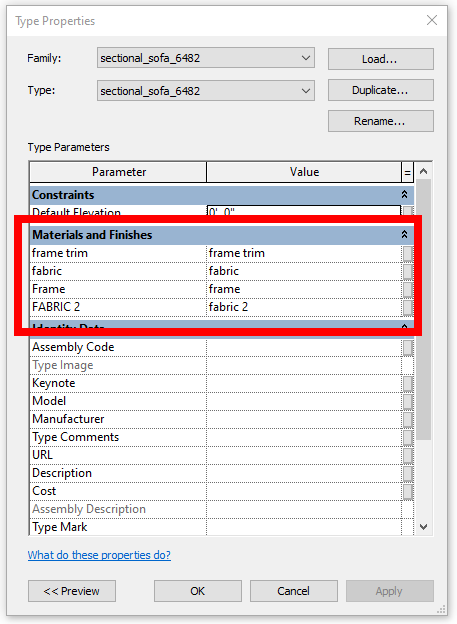
- Click on the Console table (it's on the east wall to the right of the view).
- Change the
Materials and Finishestype properties in the Properties Palette to use similar materials. Set Table Surface =Laminate - Ivory, matte, Table Frame =frame, and Pedestal =frame.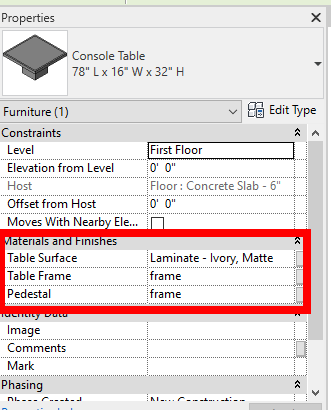
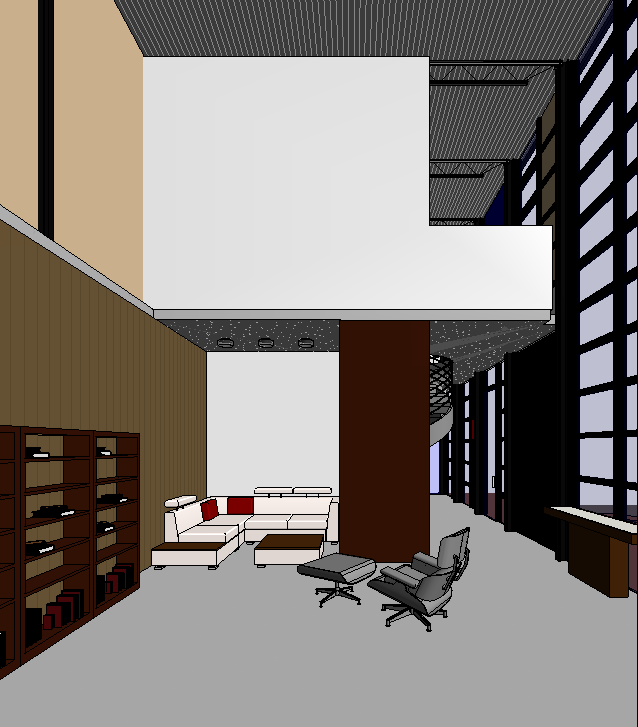
- See finished results below:
Save your file
Save your file as Spring2024_3262_firstinitial_lastname_LAB07_EX01.rvt