
Doors and Windows
Files you'll need to complete this Lesson
In this lesson you will learn how to add doors and windows to your walls. You will also learn how to change the placement once inserted. Then you will learn how to change door window and height properties
Getting Started
Make sure you have the source files downloaded for this exercise. You can get them with the links above.
Place Exterior Doors
Doors are hosted elements, so to place hover over a wall and then left click when the preview lines up with where you want to place it.
If the door is swinging in the wrong direction you can press space bar to flip it before placement.
- Open the Revit file:
Lab01_E2_Adding Doors and Windows.rvt - Open the
Ground Floorview. - On the
Architecturetab click on theDoorbutton. - In the Properties Palette, select the door type
Double-Glass 48" x 102". - Place the door at each location where the underlay is identified as
Type Aon the outer walls. - In the Properties Palette, select the door type
Single-Glass 24" x 102". - Place the door at each location where the underlay is identified as
Type Bon the outer walls.
Place Interior Doors
- On the
Architecturetab click on theDoorbutton. - In the Properties Palette, select the door type
Single-Flush 20" x 84". - Place the door at each location where the underlay is identified as
Type A. - In the Properties Palette, select the door type
Single-Flush 24" x 84". - Place the door at each location where the underlay is identified as
Type B. - In the Properties Palette, select the door type
Double-Flush 40" x 84". - Place the door at each location where the underlay is identified as
Type C. - Hit the
esckey twice to exit theDoorCommand
Place Exterior Windows
Windows are hosted elements, so to place hover over a wall and then left click when the preview lines up with where you want to place it.
Hovering your mouse around the outside of the wall will ensure that the window is facing in the correct direction.
- On the
Architecturetab click on theWindowbutton. - In the Properties Palette, select the window type
Casement with Trim 24" x 24". - Place the window at each location where the underlay is identified as
Type A. - In the Properties Palette, select the window type
Casement with Trim 44" x 24". - Place the window at each location where the underlay is identified as
Type B. - In the Properties Palette, select the window type
Casement with Trim 24" x 48". - Place the window at each location where the underlay is identified as
Type C. - In the Properties Palette, select the window type
Casement with Trim 44" x 48". - Place the window at each location where the underlay is identified as
Type D. - Hit the
esckey twice to exit theWindowCommand
Change Window Head Height
- Open the
{3D}3D View. - Notice that some of the windows that you just placed don't line up vertically with some of the existing windows. Let's look at the windows in the NE Corner of the model.
- Select the two
Type Awindows by holding down theCTRLkey and clicking on both of them. - In the properties palette, change the
Head Heightvalue to7' 0"
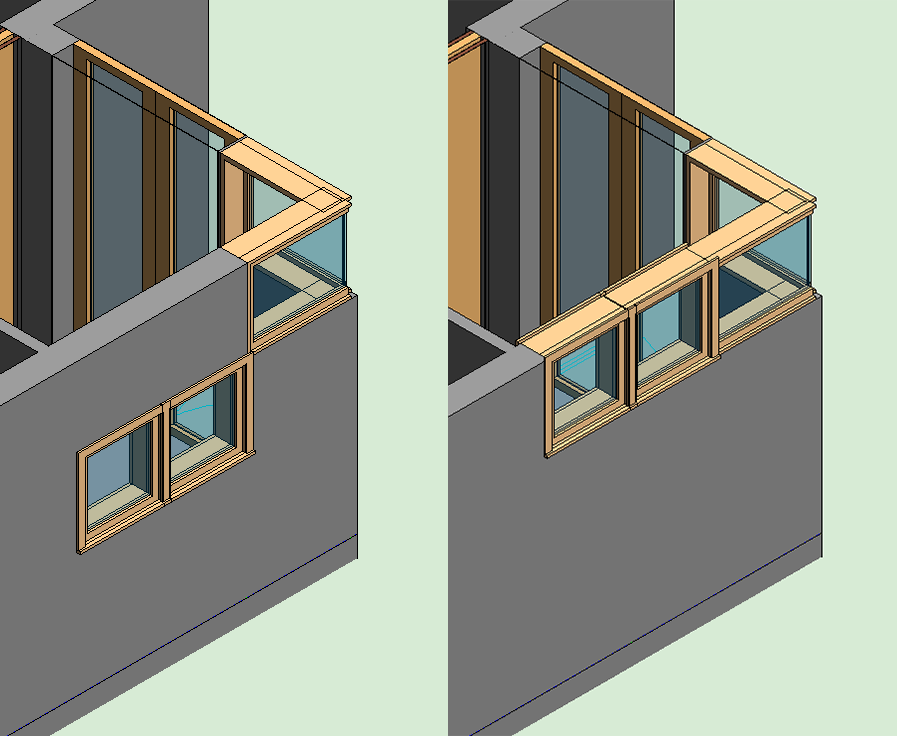
- Click
Applyat the bottom of the properties palette to confirm the changes and you will see that these windows now line up! - Repeat steps 3 through 5 for window types
BCandDseparately to make all of them line up as well.
Save your file
Save your file as Spring2024_3262_firstinitial_lastname_LAB01_EX02.rvt