Modeling Wall Types
Files you'll need to complete this Lesson
In this lesson you will learn how to edit a wall type by substitution-in-place.
Getting Started
Make sure you have the source files downloaded for this exercise. You can get them with the links above.
Change Already Placed Exterior Wall Types
- Open Revit file:
Lab02_E1_Modeling wall types_structures_design features.rvt. - Open the
Ground Floorplan view. - Select all exterior walls of type
Generic - 8". Do this by right clicking on a selected wall of this type and selectingSelect All InstancesthenVisible in View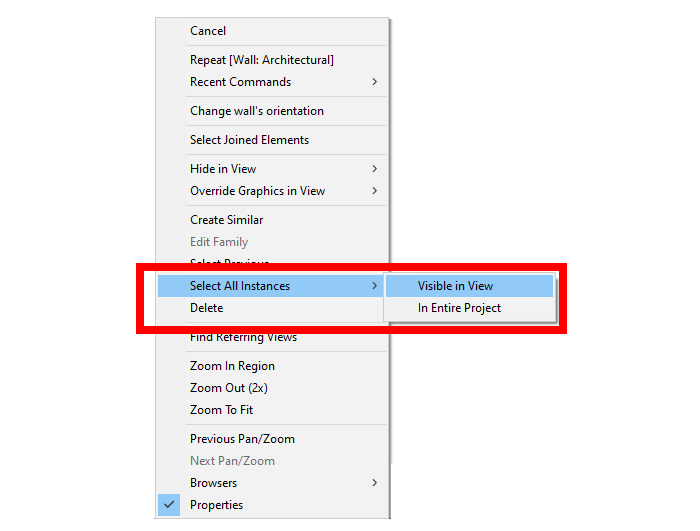
- Change the type to
Exterior - Brickin the properties pallette. - Open the
{3D}3D view to confirm that the exterior walls are now brick.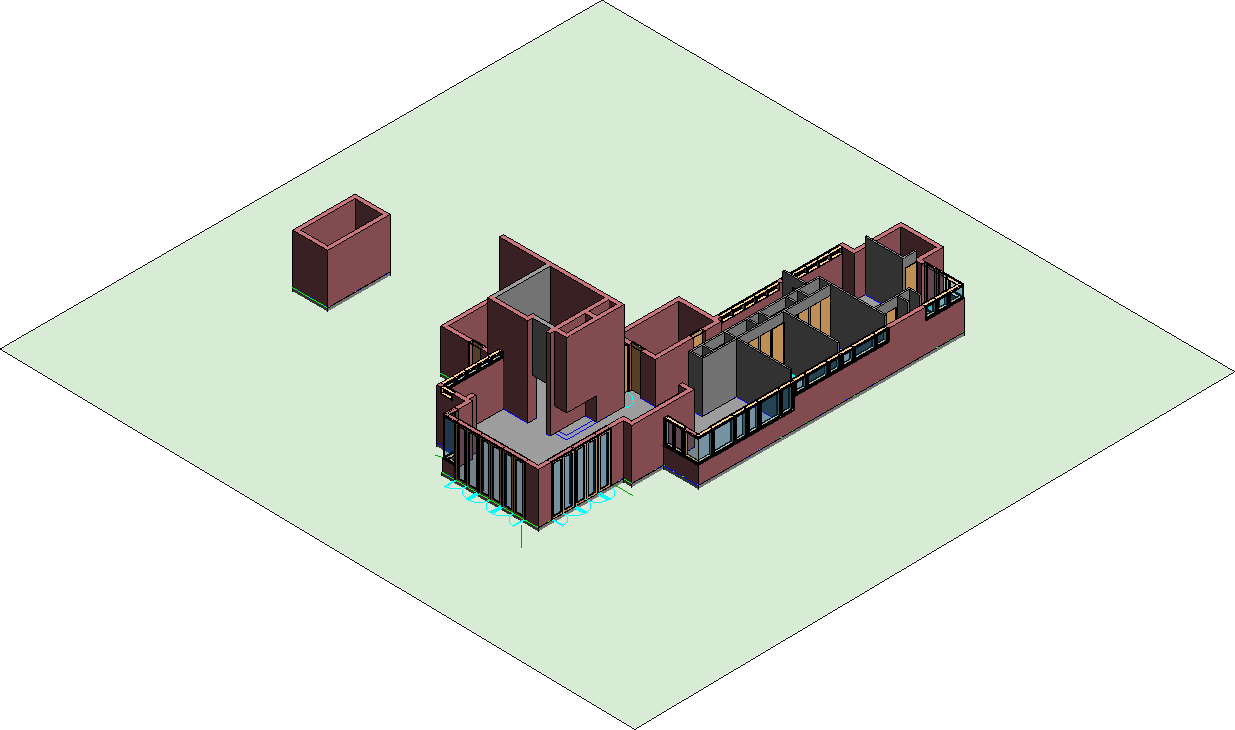
Create a new Interior Wall Type
- Open the
Ground Floorplan view. - On the Architecture Tab click the
Wallbutton on the ribbon. - In the Properties Pallette select the
Generic 8"wall type. - Click the
Edit Typebutton. - In the
Type Propertiespop-up window click theDuplicate...button. - Set the name to
Wood Panel Walland clickOK.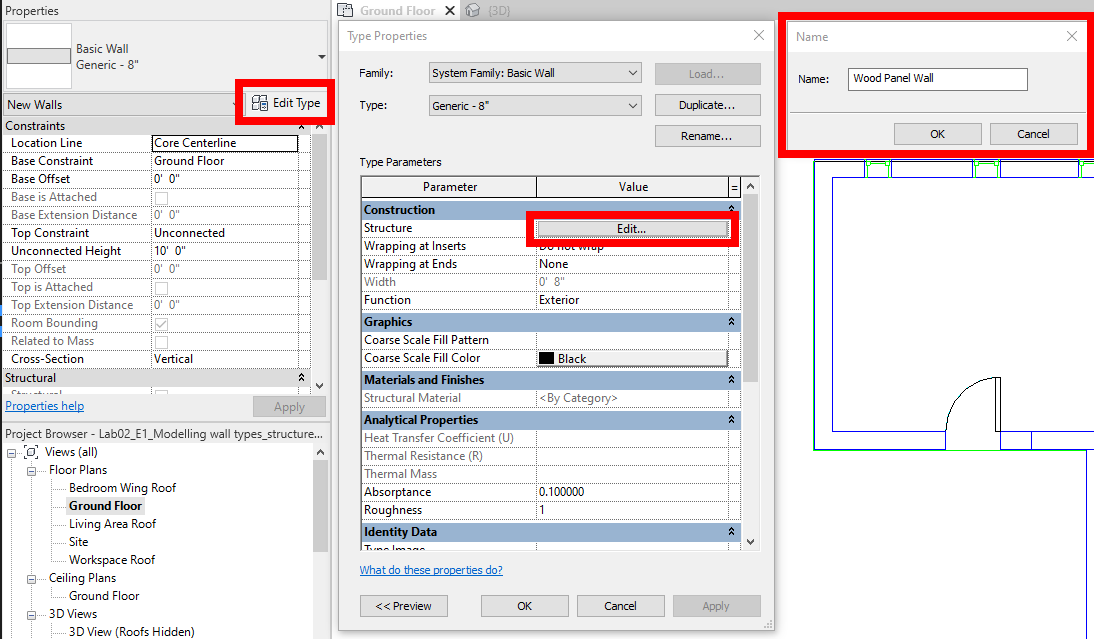
- Click the
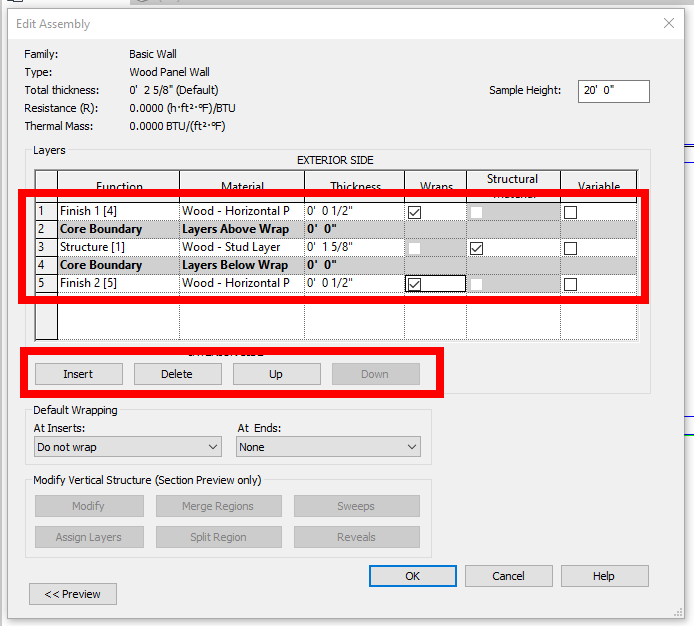
Edit...button on theStructurerow of the table. It should be at the top of theType Propertiespop-up. - Change the material from
<By Category>toWood - Stud Layerand change it's thickness to1 5/8" - Create two more wall layers by clicking the
Insertbutton twice. - Move one of the new layers all the way to the exterior side of the wall assembly by clicking the
Upbutton until it is at the top of the layer table. - Change this layer's Function to
Finish 1 [4]to set it's behavior in the model environment. - Change it's material to
Wood - Horizontal Paneland set it's thickness to1/2" - Move the other wall layer that you created all the way to the interior side by clicking the
Downbutton twice. - Change it's function to
Finish 2 [5]to let Revit know it's an interior finish. - Change it's material to
Wood - Horizontal Paneland set it's thickness to1/2" - Verify your wall assembly look like the below screenshot then press OK twice to exit both dialog boxes.
- Click
Modifyon the ribbon to exit the wall placement command
Use the New Wall Type
- Select all interior walls with type
Interior - 3 1/8" Partition (1-hr)just like we did for the exterior walls. - Replace them with the
Wood Panel Walltype we just created. - Select the
Panellabeled walls on the south side of the building and set their type toWood Panel Walltoo. - Open the
{3D}3D view and verify it looks like the image below.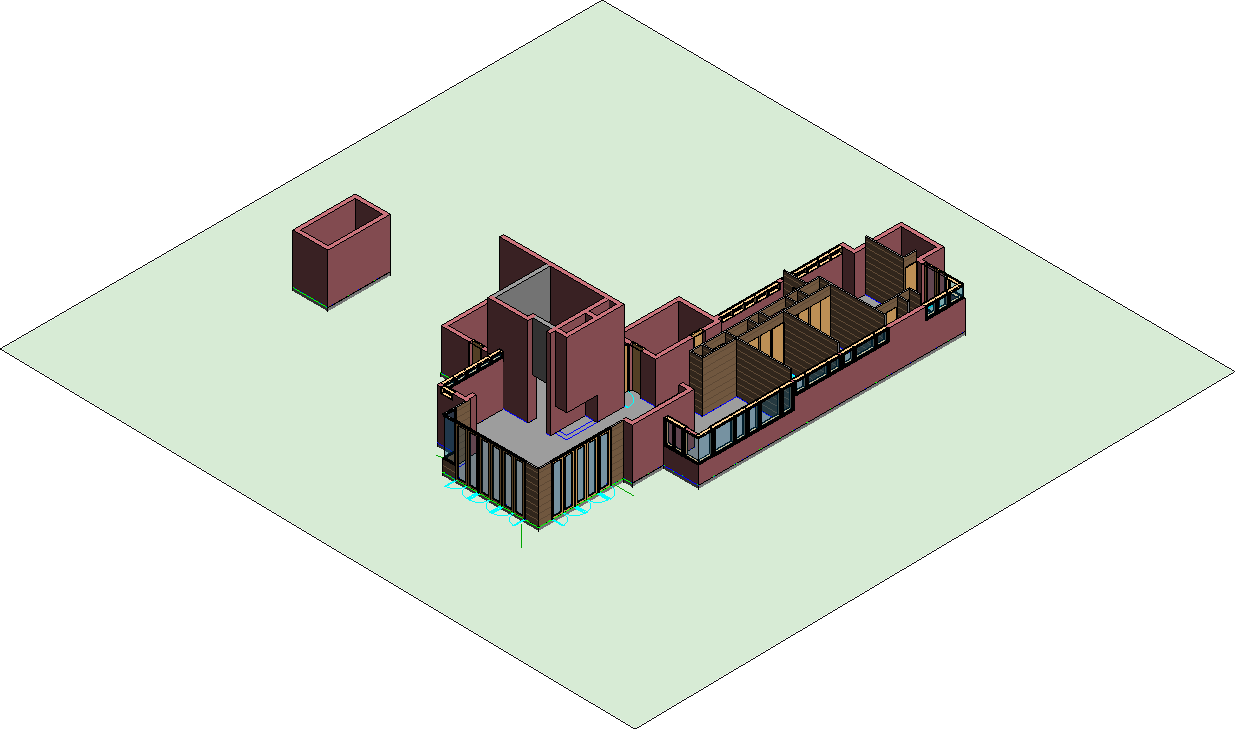
Save your file
Save your file as Spring2024_3262_firstinitial_lastname_LAB02_EX01.rvt